UI String Customization
What is UI String Customization?
UI string customization is a self-service feature that allows you to modify labels and messages in the Sentinel EMS vendor portal to meet your business requirements.
This flexibility enables you to improve your customers' user experience with more meaningful and customized messages.
Prerequisites for UI String Customization
You must have administrative rights in Sentinel EMS. For details, see Roles.
Downloading the Labels and Messages File
Follow the steps below to download the default JSON file containing labels and messages that Sentinel EMS uses:
1.Select Configuration > UI String Customization to navigate to the UI String Configuration page.
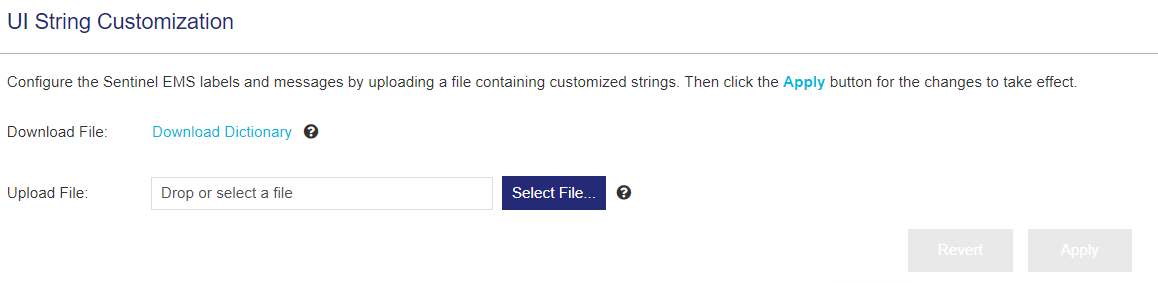
2.Click the Download Dictionary link to download the default JSON file. This file contains the current labels and messages that are used in Sentinel EMS.
Configuring Labels and Messages
The JSON file contains labels and messages as combinations of "key" and "value" pairs using the following syntax:
"login": "Log In",
"password": "Password",
In the above, "login" and "password" are the keys and "Log In" and "Password" are the corresponding values. To modify the label or message for the user interface, change the "value" to the required text. For example:
"login": "Enter User",
"password": "Enter Password",
In the above example, the key "login" which was used for the label "Log In", is modified to "Enter User". Similarly, the key "password", which was used for the label "Password", is modified to "Enter Password".
Dynamic arguments are also used as parts of labels and messages. It is recomended that you not modify the dynamic arguments enclosed within {{}} in the original labels and messages. An example of dynamic argument in a message is given below:
"DeleteSuccess": "Successfully deleted the <strong>{{ id }}</strong> user.",
You can also change labels and messages terminology globally or for a specific entity by making changes to the "COMMON" section of the JSON file. For example:
 "refId1": {
      "ENTITLEMENTS":  "Entitlement Reference ID",
      "DEFAULT": "Reference ID 1"
    },
In the above example, the key "refId1" is customized. The "ENTITLEMENTS" keyword specifies that for the entitlements entity, the refId1" key will have the value "Entitlement Reference ID". The "DEFAULT" keyword specifies that for all entities other than entitlements, the "refID1" key will have the value, "Reference ID 1". Also, remove existing entries of "refId1" key to avoid conflicts.
The global value for a key is specified using the "DEFAULT" keyword. Entity specific definitions of a key can be provided using the entity name in uppercase such as, "ENTITLEMENTS" or "ACTIVATIONS".
Also, remove existing entries of "refId1" key to avoid conflicts.
Uploading the Labels and Messages File
Upload the file containing configured labels and messages.
1.Select Configuration > UI String Customization to navigate to the UI String Customization page.
2.Click Select File to open the Open dialog box and browse to the modified JSON. This file contains the customized labels and messages. Alternatively, you can drag and drop the modified JSON to the window.
3.Click Apply to apply the changes. The changes are immediately available in the user interface.
Reverting Changes
Use the Revert button to revert all string changes and customizations and restore the default, out-of-the-box JSON file labels and messages.