Custom Reports
IMPORTANT Custom reports are not available via self-service but can be made available through an engagement with Thales Professional Services who are familiar with the internal workings of the platform.
What is a Custom Report?
A custom report is customized report that can be created to meet your specific requirements. This is useful if the pre-defined reports available in Sentinel EMS do not meet the needs of your organization.
If you need to create custom reports, contact Thales Professional Services who can work with you to set up and create custom reports.
Prerequisites for Creating a Custom Report
You must have administrative rights in Sentinel EMS.
Custom Report Status
The Status attribute for a custom report can be one of the following:
>Enabled: The custom report is available for the vendor user. It can be generated from the Reports page.
>Disabled: The custom report is not available. It does not appear on the Reports page.
Creating a Custom Report
1.From the navigation pane, select Reports > Custom Reports to view the Custom Reports page.
2.Click the Add Custom Report button.
3.Fill in the custom report attributes.
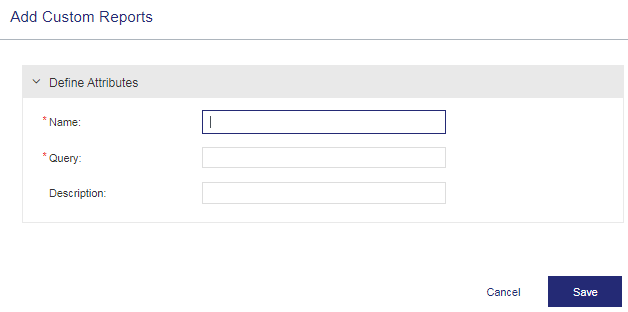
4.Click Save.
Custom Report Attributes
The following table explains the attributes that are used to create a custom report:
| Attribute | Description | Required/Optional | Valid Values |
|---|---|---|---|
| Name | Name of the custom report. | Required |
>Alphanumeric >Must be unique |
| Query |
SQL query to generate report. For example: select * from T_ENT_Activation; For details, see Input and Lookup Attributes in Custom Reports. |
Required |
>Alphanumeric >Must be valid SQL syntax |
| Description | Additional information about the custom report. | Optional |
>0 to 500 characters >Alphanumeric |
Input and Lookup Attributes in Custom Reports
The SQL queries that you build in Sentinel EMS do not need to be static. You can also add inputs and lookup attributes to the SQL query.
In the Query attribute, build a query that enables vendor users to add input while generating the report. You can do this by appending the @ symbol to the input attribute in your query. The input attribute cannot contain spaces. For example:
select * from T_ENT where entId=@Entitlement_ID
Here, @Entitlement_ID, specifies an input attribute. The value for this input attribute is provided by the vendor user while generating the report.
This attribute name is displayed while accepting input from the vendor user. This means that in the above query, entId is the actual field name in the database, and "Entitlement_ID" is the name that the vendor user will see while providing the input for entID.
Whenever an input attribute is used in a query to create custom reports, you must provide the following additional attributes details:
>The data type: String, Date, Number, or Lookup.
If you specify Lookup, specify the value in the text field that appears.
>Whether the input attribute is mandatory or optional.
>If you specify Lookup, the additional attribute Lookup Query for <input attribute name> appears. Enter an SQL query in this field. The lookup query must return only two columns and must contain a unique key-value pair. For example:
select entId, eid from T_ENT
Here, entId is the value that will be assigned to the input attribute, and eid will be shown in the Entitlement_ID field in the report.
>In cases where queries use start date and end date as a date range, it is recommended that the custom query for date fields should use the date function of SQL. For example:
select * from t_audit_log where EntityType in ('User','Role','Namespace','Feature','LicenseModel','Customer','Contact','Product','Download') and
Date(OpDateTime) between @Operation_start and @Operation_end
where 'User' refers to the Vendor User entity, and 'Contact' refers to the User entity.
Here, the Date() function is used on the field, OpDateTime.
>If date fields are not set in the custom report input, their values are set to the current date by default. For example:
https://test.sentinelcloud.com/ems/api/v5/reports/c5c8761f-02e47363ae1c?Lic_Expiration_Date_From=2022-12-14&Lic_Expiration_Date_To=2022-12-14&format=CSV&.rn=4735&ET=104c6760-872b-4526-8cba-99757690540c
To specify a date as null in the custom report input, remove the date fields from the request URL. For example:
https://test.sentinelcloud.com/ems/api/v5/reports/c5c8761f-02e47363ae1c?format=CSV&.rn=4735&ET=104c6760-872b-4526-8cba-99757690540c
>The following reserved words may not be used in a query (by themselves or in conjunction with other words). Sentinel EMS considers these words unsafe. Using any of these words in a query will generate an error.
•INSERT
•DELETE
•UPDATE
•DROP
•CREATE
•TRUNCATE
•INFORMATION_SCHEMA
•SYS
•MYSQL
Generating a Custom Report
To generate a custom report:
1.From the navigation pane, select Reports to open the Reports page.
2.Click Report and select Custom Reports. All enabled custom reports are displayed in the list.
3.Select the custom report that you want to generate.
4.Update the input and lookup attributes (if any). For more information, see Input and Lookup Attributes in Custom Reports.
5.Specify the Output Format for the custom report:
•CSV: Generates the custom report in CSV format.
•PlainXML: Generates the custom report in plain XML format.
6.Click Generate to generate the report.
Actions for a Custom Report
The following table lists the actions available for custom reports:
| Action | Description | |
|---|---|---|

|
Edit |
Updates information for an existing custom report. |

|
Delete |
Deletes a custom report. |

|
Disable | Disables a custom report. You cannot generate a disabled report. |

|
Enable | Enables a disabled custom report. |