Configuring Client and Sentinel EMS
Sentinel Connect helps in the quick onboarding of a Client (Tenant) to Sentinel EMS. So, the first step in Sentinel Connect configuration is to establish a link between the client and Sentinel EMS. This is done by providing details of the client being on-boarded and details of the Sentinel EMS instance provisioned for the client.
After a client’s purchase order is successfully processed, the client and order details flow to Sentinel Connect. You need to enter these details in Sentinel Connect and verify that the details are correct.
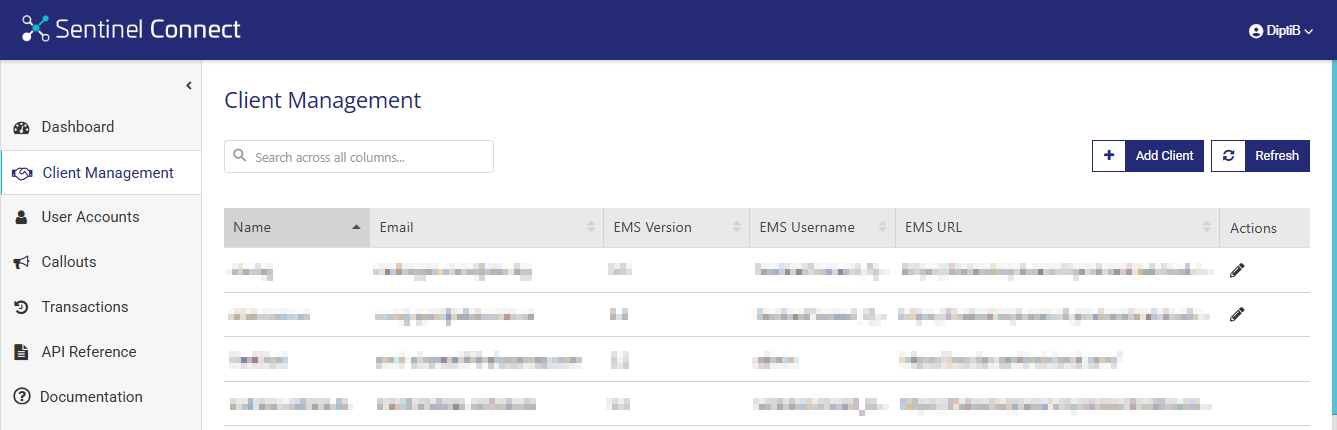
1.In Sentinel Connect, click Client Management in the left pane to open the Client Management page.
2.Click Add Client to open the Add Client page. The Client tab is selected by default.
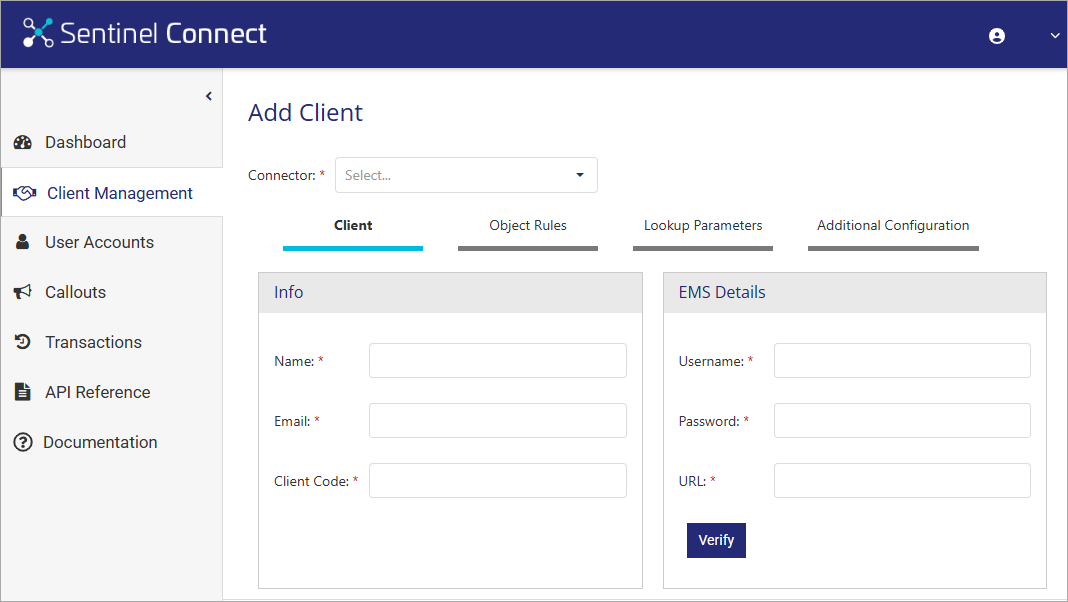
3.Enter the client details in the Info section (all the details are mandatory):
|
Field |
Description |
|---|---|
|
Name |
Name of the client that you want to connect with the Sentinel EMS. |
|
|
Email address of the client (tenant). |
|
Client Code |
The code assigned to a client. This code is used to represent the client in Sentinel Connect dashboard graphs and charts. It can have a maximum of four alphanumeric characters. |
4.Enter details of the EMS instance hosted for the client in the EMS Details section (all the details are mandatory):
|
Field |
Description |
|---|---|
|
Username |
The username for the Sentinel EMS login. |
|
Password |
The password for the Sentinel EMS login. |
|
URL |
URL of the Sentinel EMS instance hosted for the customer. |
5.Click Verify to initiate the Sentinel EMS credential verification and ensure that configurations are correct. Sentinel Connect displays a successful message if it is able to establish a connection with Sentinel EMS, otherwise, it displays an error.
Also, on clicking Verify, the Version field gets populated showing the current Sentinel EMS version. It is a read-only field. You can use the Update button to update the Sentinel EMS version.
6.Click Save to save the details.
Editing Client and Sentinel EMS Configurations
To edit the configuration details:
1.On the Client Management page, under Actions, click ![]() . The Edit Client page is displayed.
. The Edit Client page is displayed.
2.Edit the required fields.
3.Click Save.
NOTE Entering Password is not mandatory during the client update.