Configuring Additional Configurations
Sentinel Connect introduces support for clients who are using Sentinel EMS with an enforcement.
In Sentinel Connect, there are two categories of orders:
>Initial Order: Initial Orders are created for the initial purchase of a product, where a new license is generated upon manual activation. When a user places the first order, Sentinel Connect handles it as an Initial Order.
>Update Order: Update Orders are subsequent purchases made after the initial order. An update order is created as an additional or renewal order for an existing Sentinel Key, where the details of the previous Sentinel Key are provided. These orders are activated on the previously-used Sentinel Key. By configuring the relevant rules in the Additional Configuration tab, the handling of update orders are automated.
The Additional Configuration in Sentinel Connect is presented as easy-to-click check boxes that you select or clear according to your business logic. The configurations allow businesses to tailor the behavior of entitlement creation and activation.
Steps for Performing Additional Configurations
To configure Additional Configurations:
1.Click Client Management in the left pane of Sentinel Connect to open the Client Management page.
2.Click Add Client to open the Add Client page.
3.Click Additional Configuration tab.
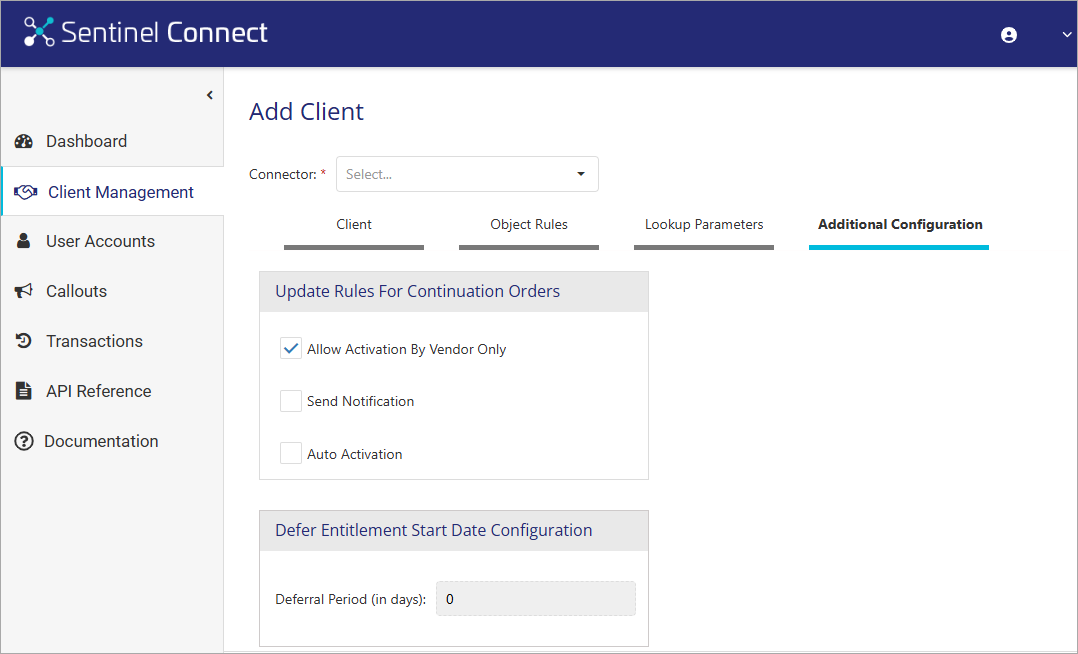
4.Select or clear the following configuration check boxes according to your business requirement for managing entitlements in Sentinel EMS.
| Field | Description |
|---|---|
|
Update Rules for Continuation Orders |
|
| Allow Activation by Vendor Only |
Sets the allowActivationBy parameter to Vendor Only when creating entitlements using Sentinel EMS REST API Reference. This allows only the vendor users to activate the entitlements. Default Value: Selected |
| Send Notifications |
Sets the sendNotification parameter to true in Sentinel EMS, allowing Sentinel EMS to send notifications to the user email defined in the entitlement after activation. Default Value: Cleared |
| Enable Automatic Activation |
Calls the Add Activation API to automate the activation process after creating the entitlement in Sentinel EMS. Default Value: Cleared |
| Defer Entitlement Start Date Configuration | |
| Defer Period (in days) | Specifies the number of days by which the start of entitlement should be deferred. For details, see Defer the Entitlement Start Date. |
5.Click Save.
Defer the Entitlement Start Date
The Defer Entitlement Start Date feature enables deferring the start of entitlements configured at the Entitlement Line-Item level, Sentinel EMS Product level, and Sentinel Connect level, providing flexibility in managing entitlement activations across various business layers. This feature is supported in both Create and Update flows; however, it is important to note that it works only when the Order Type is set to 'Initial Order' (case-sensitive).
Prerequisites
To successfully enable and configure the Defer Entitlement Start Date feature, please ensure the following prerequisites are met:
1.In the Object Rules tab, enable the Defer Entitlement Start Date option.
2.In the Additional Configuration tab, set the default Deferral Period (in days). If not configured, the default is '0' days.
Configuration and Priority Handling
The Defer Entitlement Start Date can be configured at three distinct levels, with the system prioritizing them for runtime application. The hierarchy of priority is as follows:
1.Entitlement Line Item Level: This level has the highest priority. If a 'Delay No Of Days' custom attribute is defined at the Entitlement Line Item level (from Sentinel EMS and source CRM/ERP), the system uses this value to defer the entitlement start date.
2.Product Level: If no 'Delay No Of Days' custom attribute is found at the Entitlement Line Item level, the system then looks for it at the Sentinel EMS Product level. If present, this value is applied.
3.Sentinel Connect Level: This level has the lowest priority. If the 'Delay No Of Days' custom attribute is not configured at either of the above two levels, the system looks for the Deferral Period (in days) defined at the Sentinel Connect level.
NOTE The custom attribute name should be 'Delay No Of Days'.
Deferral Application Logic
The entitlement line item dates are adjusted as follows:
>Adjusted Line Item Start Date = Original Start Date + Delay Days
>Adjusted Line Item End Date = Original End Date + Delay Days
The overall entitlement dates are computed from adjusted line items:
>Entitlement Start Date = Earliest of all adjusted line item start dates
>Entitlement End Date = Latest of all adjusted line item end dates
Additionally, if any License Model (LM) attributes include ‘Date’ in their names and have values in the request body, those values are also adjusted as:
>Value of LM Date + Delay Days (following the same priority as above).
This ensures consistent deferral logic across entitlement line items, the entitlement, and license model attributes.