Displaying Salesforce Account ID in Account Mapping Tab
This page outlines steps to display the Salesforce Account ID in all list views under the Account Mapping tab.
NOTE These steps need to be performed only when you have upgraded from v1.5.
In this section:
>Displaying in the All, Auto Mapped Customers, Unmapped List Views
>Displaying in the Recently Viewed List View
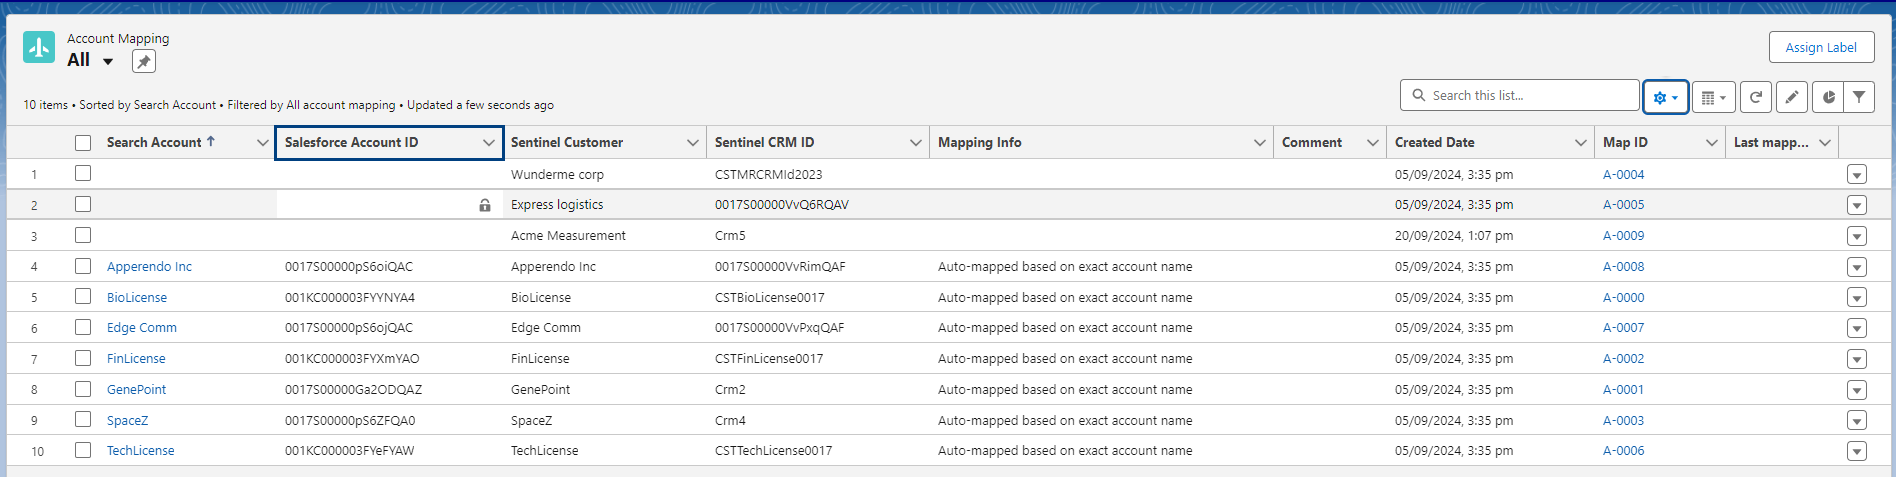
About Salesforce Account ID
The Salesforce Account ID is a unique identifier for each account in Salesforce. The image below displays the list views available under the Account Mapping tab.
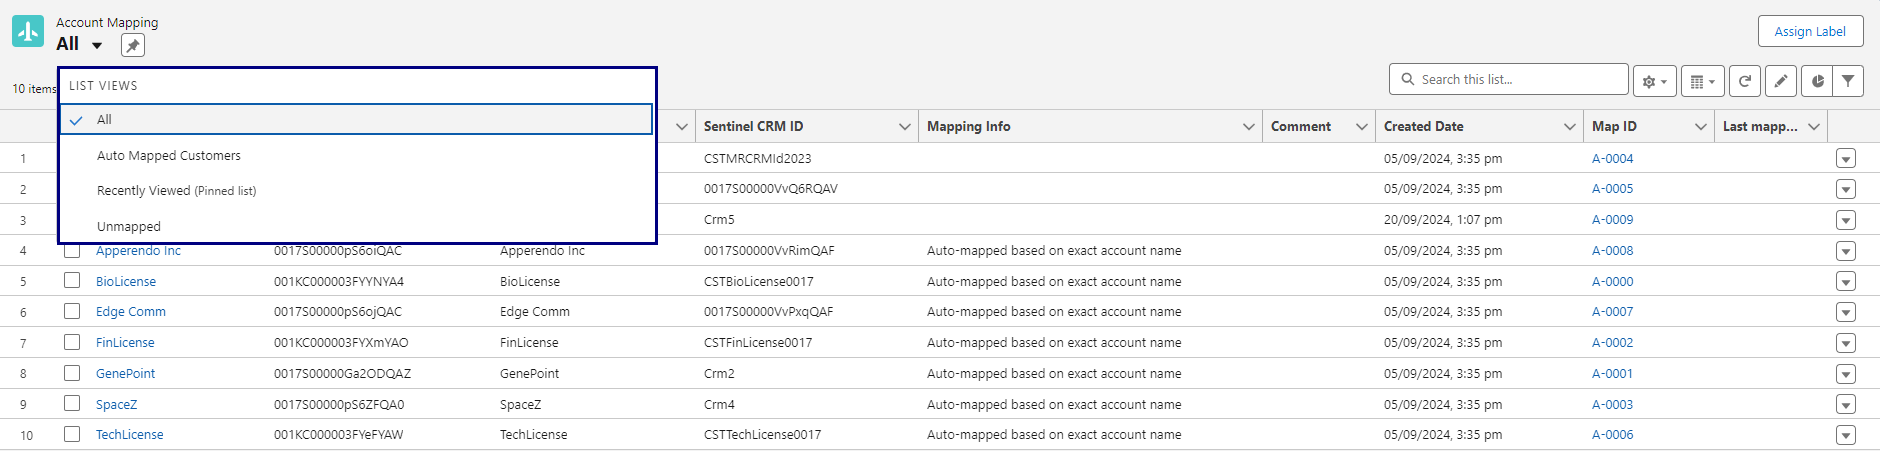
Adding this identifier is recommended as it aids in tracking and integration, particularly when account names are not unique.
Displaying in the All, Auto Mapped Customers, Unmapped List Views
1.In the Sentinel Pulse app, navigate to the Account Mapping tab.
2.Set the list view to All.
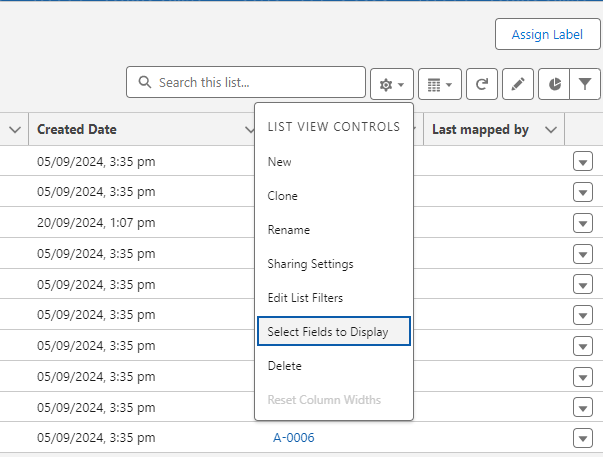
3.Click the arrow next to the List Views Controls.

4.Under List View Controls, choose Select Fields to Display.
5.In Select Fields to Display, choose Salesforce Account ID and use the arrow button to add it to the visible fields.

6.Place Salesforce Account ID after the Search Account field.
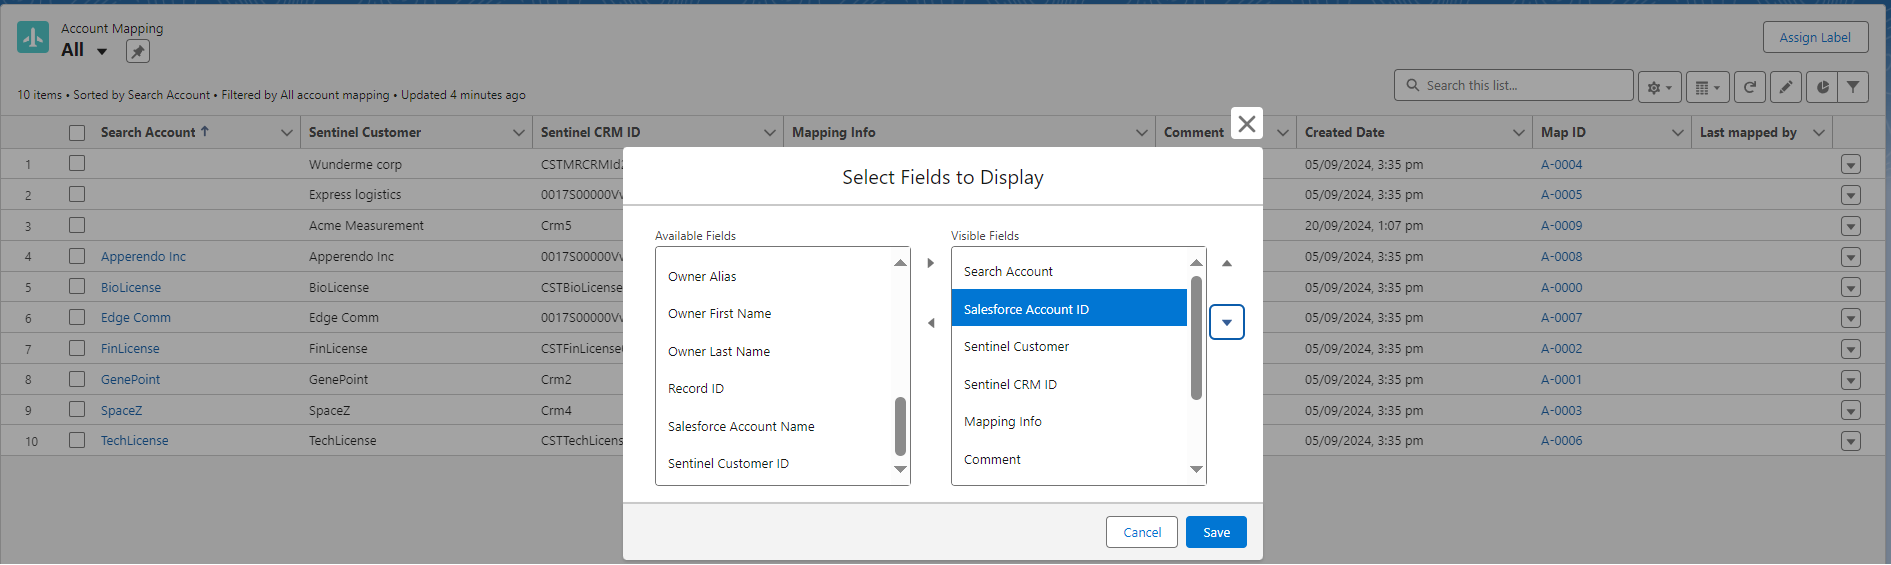
7.Click Save. The List View Updated message confirms the changes.
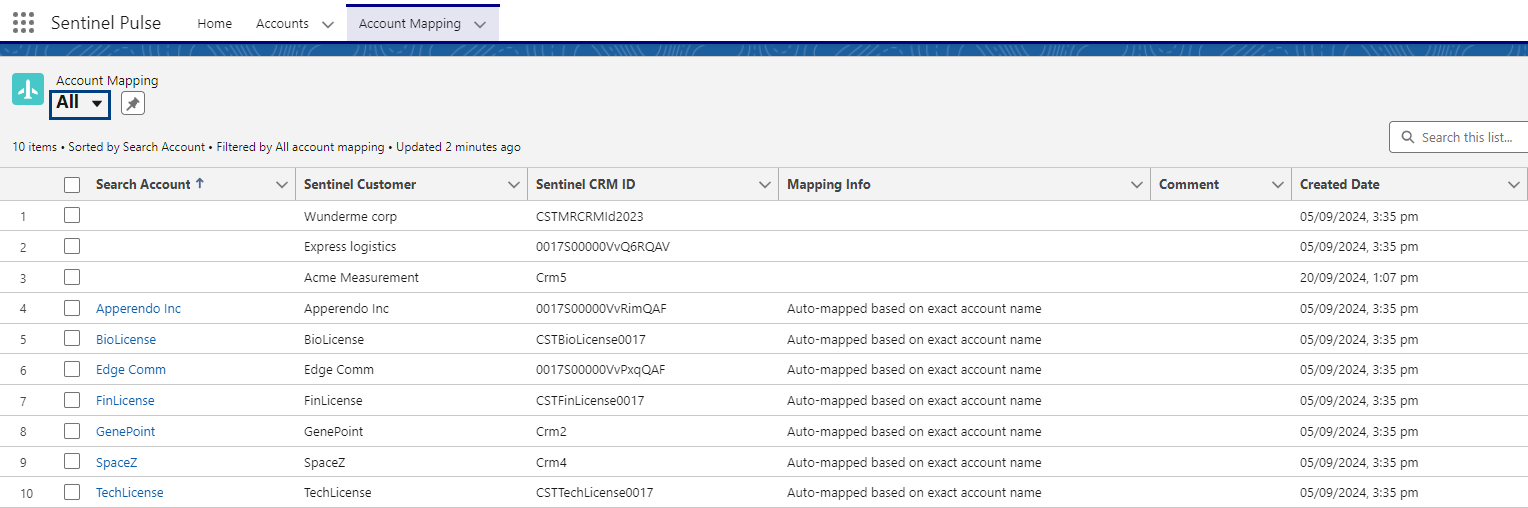
8.The Salesforce Account ID is now visible in the All list view under Account Mapping.
9.Repeat these steps for the Auto Mapped Customers and Unmapped list views.
Displaying in the Recently Viewed List View
1.In the top-right corner, click  Settings, and then select Setup.
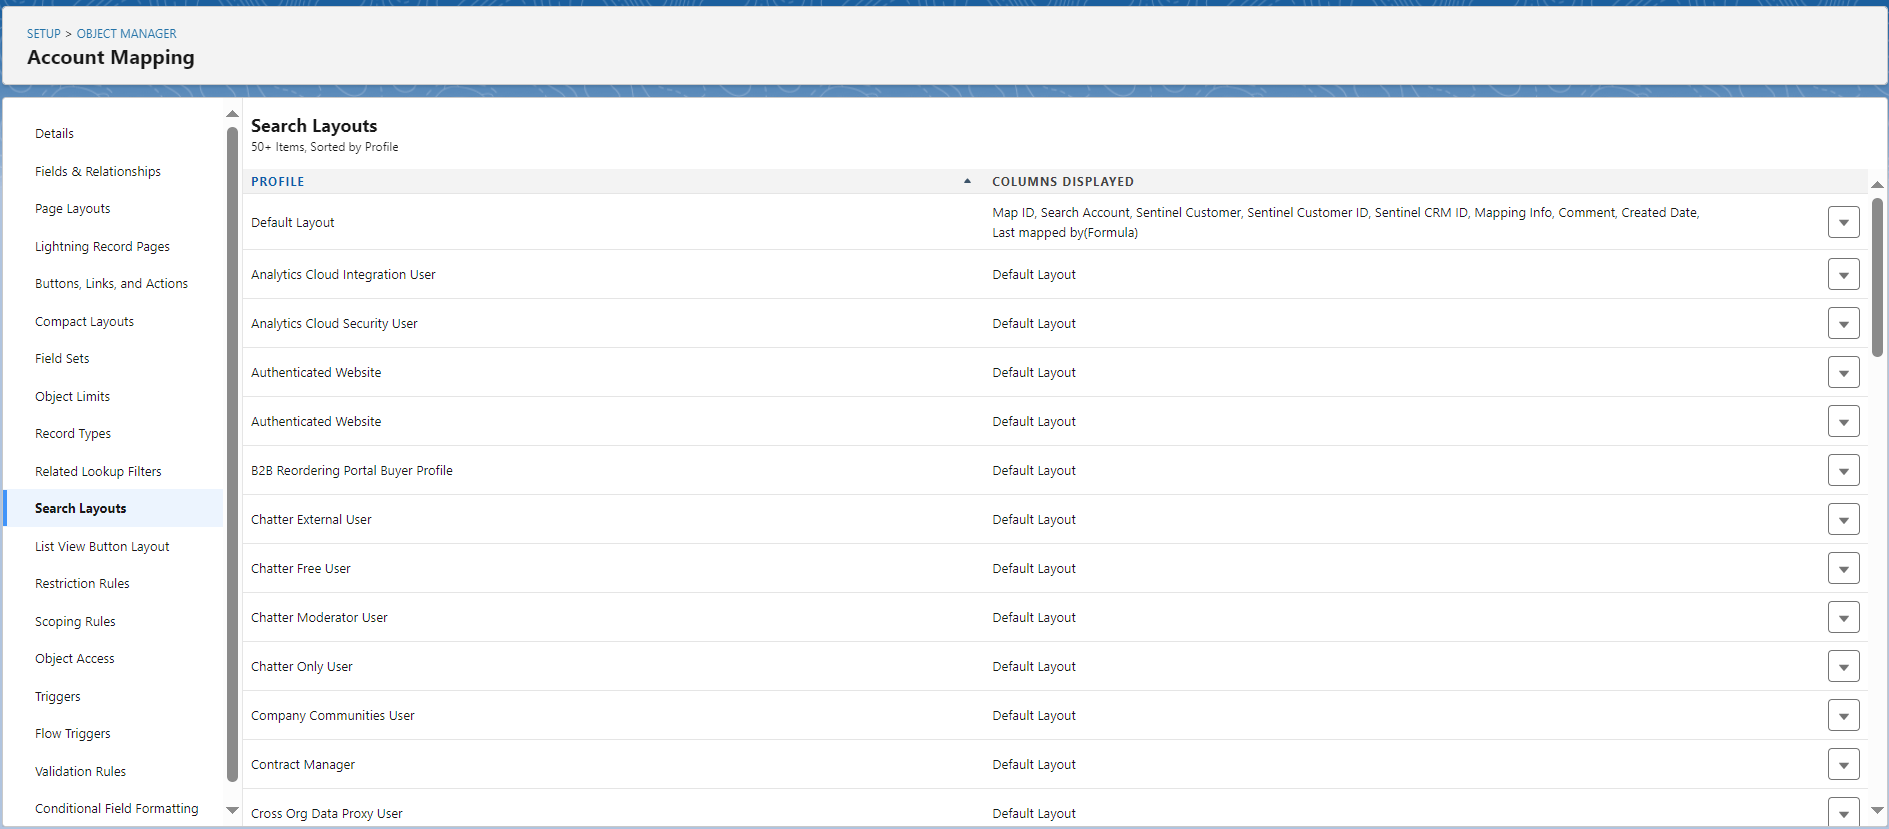
2.From the Setup Menu, choose Edit Object to open the Object Manager tab for Account Mapping.

3.In the Object Manager tab, click Search Layouts.
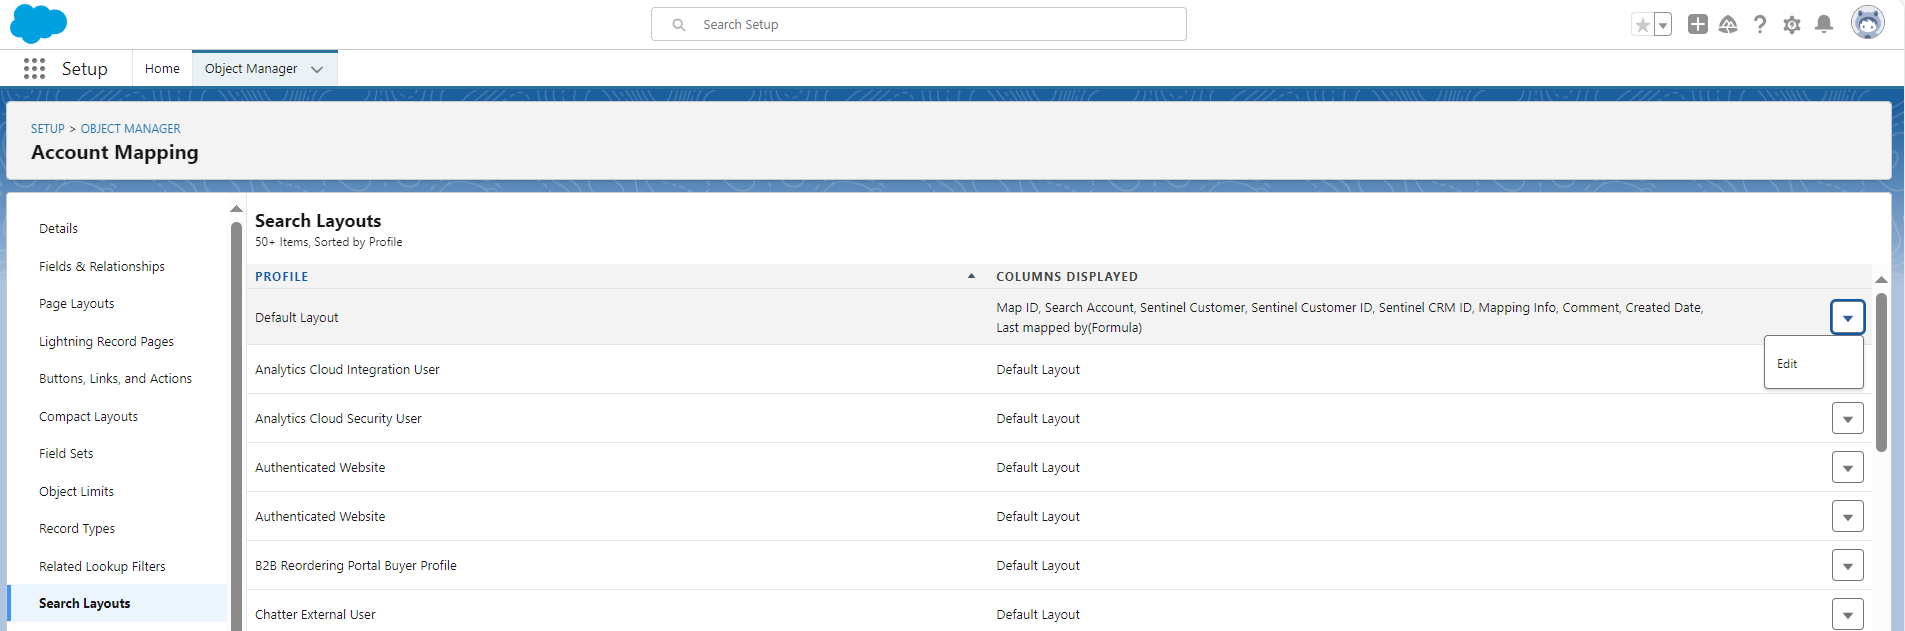
4.For Default Layout, click Edit.
5.Under Available Fields, select Salesforce Account ID and click the Add arrow button to move it to the Selected Fields.
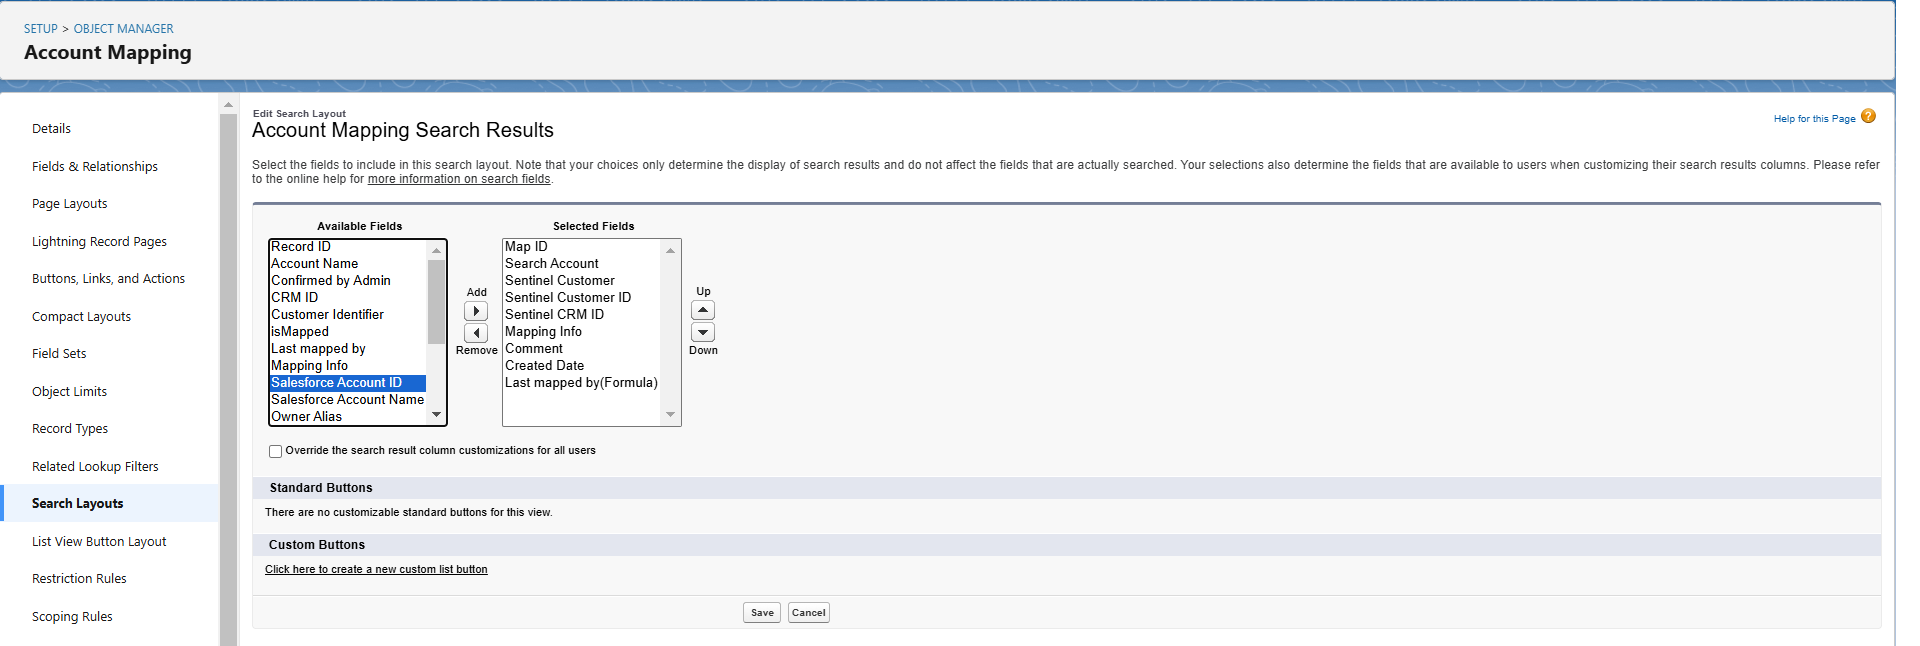
6.Place Salesforce Account ID after the Search Account field.
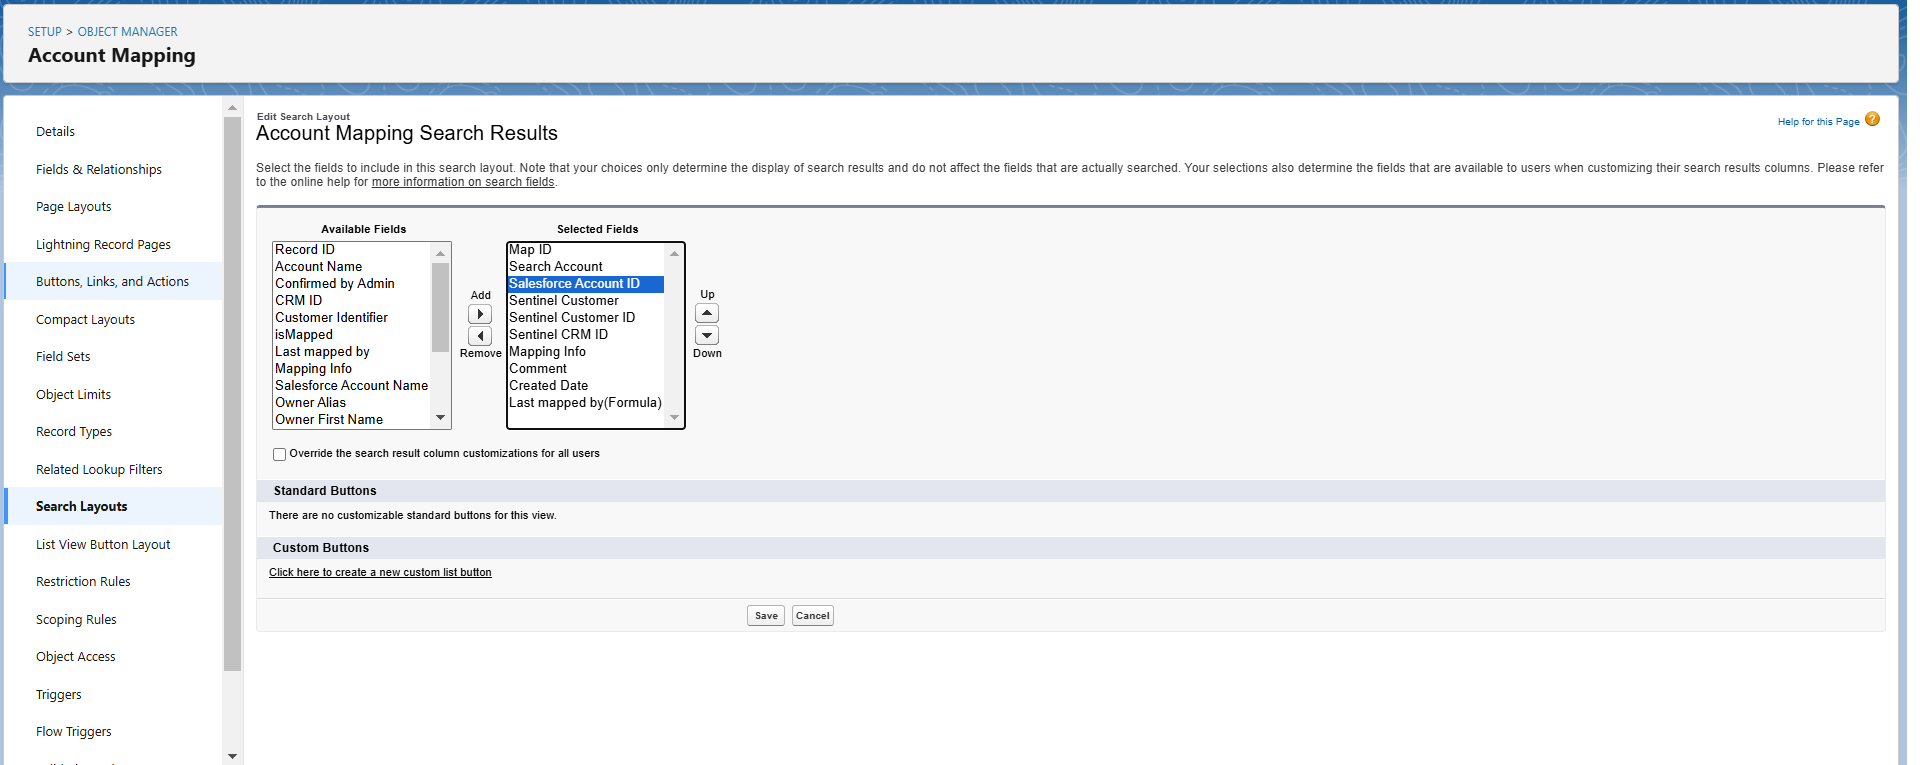
7.Click Save. The Salesforce Account ID is now visible in the Recently Viewed list view as well.
