Setting Up Accounts Page
This section describes how to set up Salesforce Accounts tab to view data and dashboards specific to Sentinel Pulse app.
In this section:
>Navigating to the Accounts Home Page
>Adding Sentinel Tab to Accounts Page
>Configuring Dashboards Filters
•The Variant Dataset Dashboard Filter
Navigating to the Accounts Home Page
1.On the left side of the navigation bar in your Salesforce org, click app launcher ![]() .
.
2.In the Search apps and items box, type Sentinel Pulse. This opens the home page of the Sentinel Pulse app.
3.Click Accounts tab.

By default, recently opened accounts are displayed in a list view. You can change the list view to All Accounts if you want to view information for all the accounts. You can also pin this setting so that next time you log in or refresh your screen, information of the required accounts is displayed.
Adding Sentinel Tab to Accounts Page
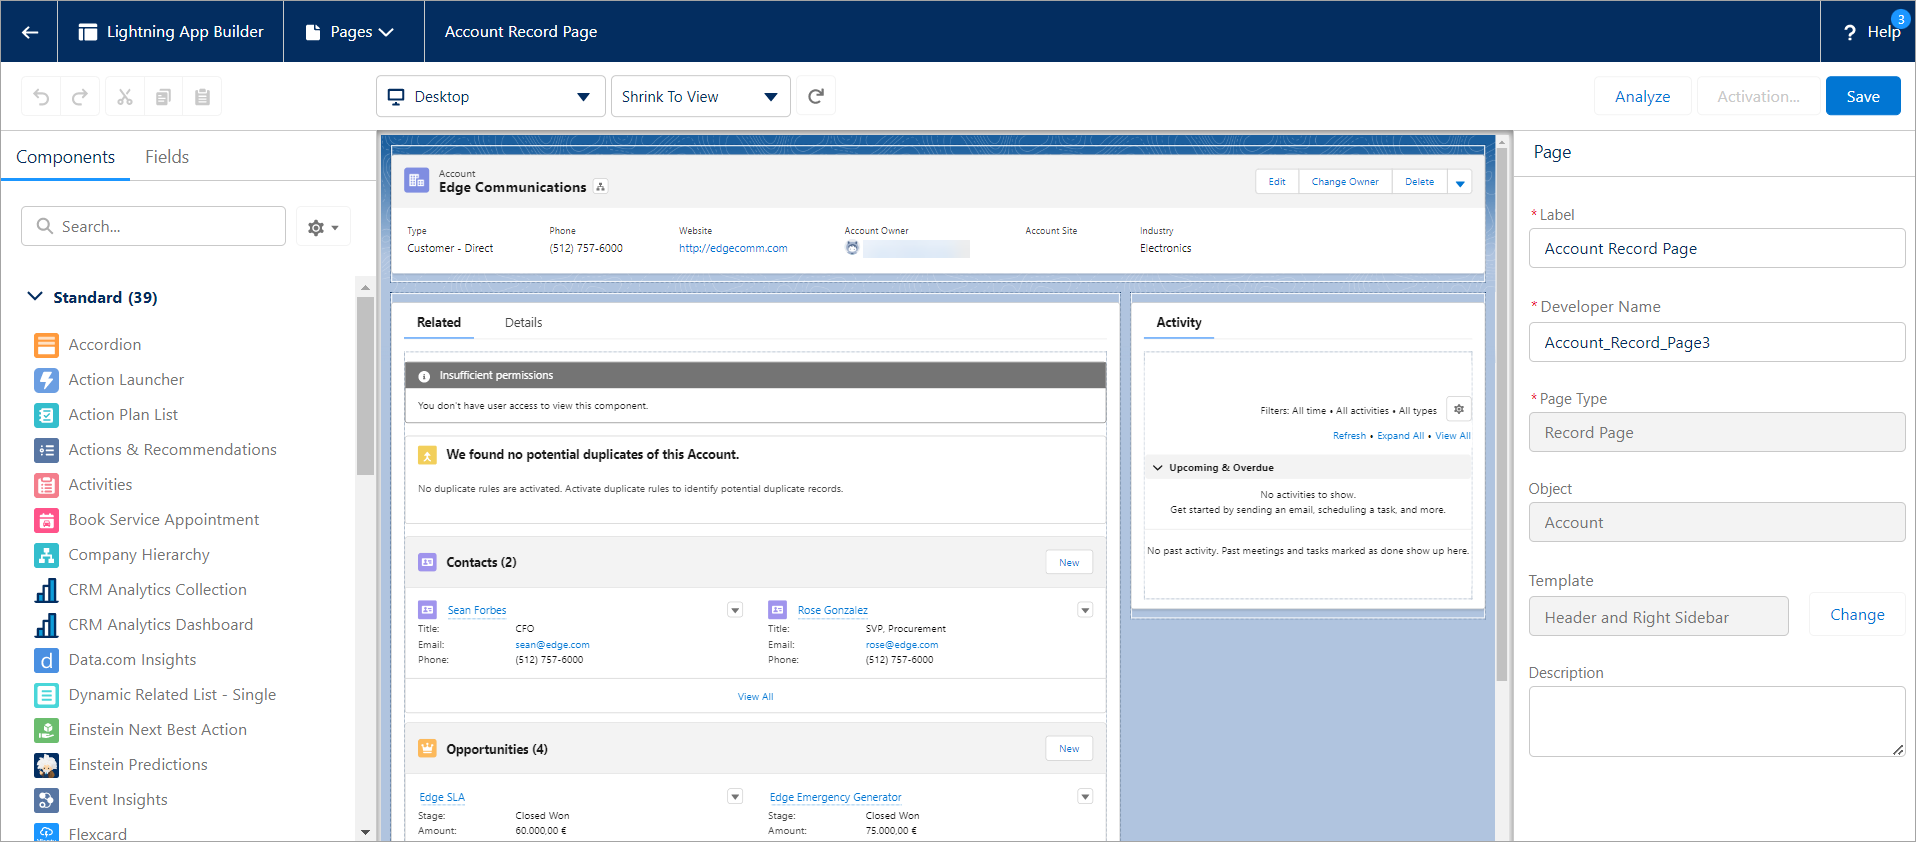
1.On the Accounts page, select an account from the table to display the details for that account.
2.On the top-right of the page, click the Setup  button and select Edit Page.
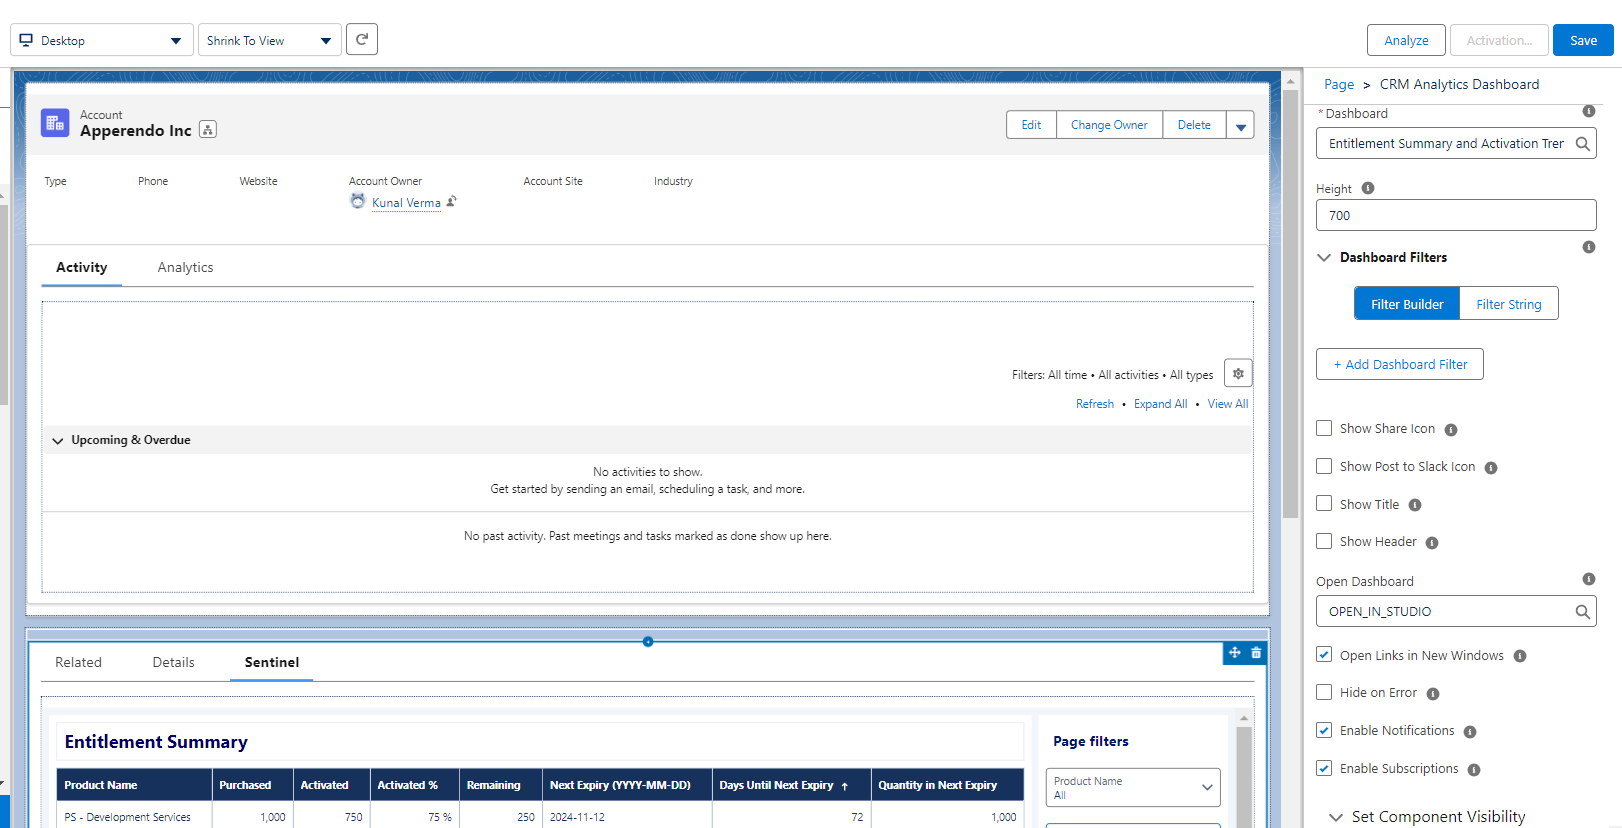
The following image illustrates the default Accounts page.
3.Update the template for Sentinel tab:
a.From the right side, under Template, click Change.

b.Select Grouped Header and One Region.
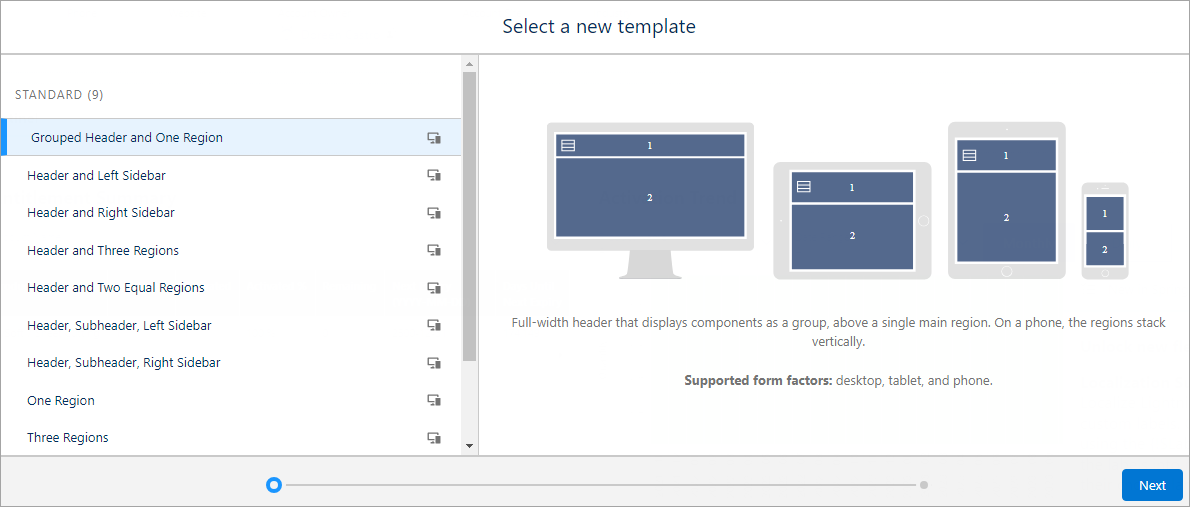
c.Click Next. The Select a new template page appears.
d.Click Done. The Accounts page appears.
4.Click within the region of an already existing tab, and then click Add Tab on the right.
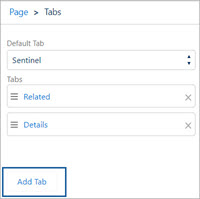
A new tab is created with Details as its default name.
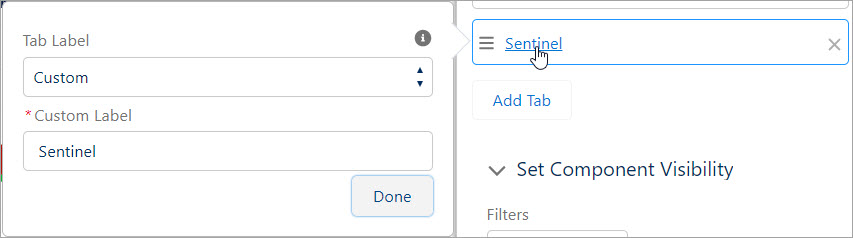
5.Click the tab that you have added and update the following:
a.Under Custom Label, enter Sentinel.
b.Click Done to save the tab.
6.From the Default Tab drop-down, select Sentinel to set it as default tab.
![]()
7.Navigate to the Sentinel tab to add dashboards.
8.From the Components tab on the left, drag CRM Analytics Dashboard to the Sentinel tab.
9.From the Dashboard drop-down on the right, select any one of the following:
>Entitlement and Activation Trend with Variants: Choose if you are using versionless products in Sentinel EMS and want the dashboard to display entitlement summary and activation trends for product variants.
>Entitlement Summary and Activation Trend: Choose if you are using default products in Sentinel EMS and want the dashboard to display entitlement summary and activation trends for such products.
10.Update the following:
>Set the height to 700.
>Clear the Show Title and Show Header boxes to avoid redundant headers on the home page.
After the dashboards are added, the next step is to add filters and pass account ID to these two dashboards to display information associated with the current account.
Configuring Dashboards Filters
Required Dashboard Filters
The following dashboard filters are required regardless of whether you are using product variants or not:
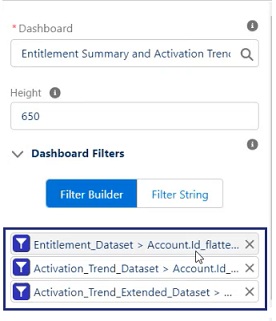
1.Click Add Dashboard Filter.
2.Select the following:
•Data Source: Entitlement Dataset
•Data Source Field: Hierarchy Path
•Operator: Contains
•Object Field: Account ID
•Select Locked and Hidden.
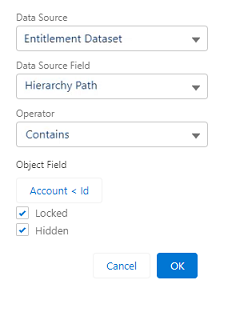
3.Click OK.
1.Click Add Dashboard Filter.
2.Select the following:
•Data Source: Activation Trend Dataset
•Data Source Field: Hierarchy Path
•Operator: Contains
•Object Field: Account ID
•Select Locked and Hidden.

3.Click OK.
1.Click Add Dashboard Filter.
2.Select the following:
•Data Source: Activation Trend Extended Dataset
•Data Source Field: Hierarchy Path
•Operator: Contains
•Object Field: Account ID
•Select Locked and Hidden.
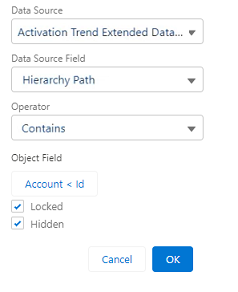
3.Click OK.
Save the settings by clicking the Save button on the top-right side.
NOTE The variant dataset dashboard filter, described in the next section, is required only when you are using Entitlement and Activation Trend with Variants dashboard.
The Variant Dataset Dashboard Filter
1.Click Add Dashboard Filter.
2.Select the following:
•Data Source: Variant Dataset
•Data Source Field: Hierarchy Path
•Operator: Contains
•Object Field: Account ID
•Select Locked and Hidden.
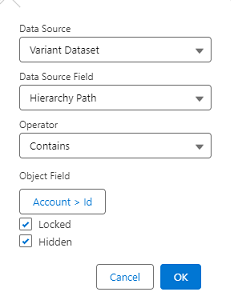
3.Click OK.
Activating the Dashboards
When the configurations are saved for the dashboards, the next step is to activate them for the Accounts Page on the Sentinel Pulse app.
1.Click Activate.
2.Click App Default tab and select Assign to App.
>Assign to Apps: Sentinel Pulse
3.Click Next, then click Save.
4.Navigate to the Sentinel Pulse app.
5.Go to the Accounts tab, and select an account to view its details.
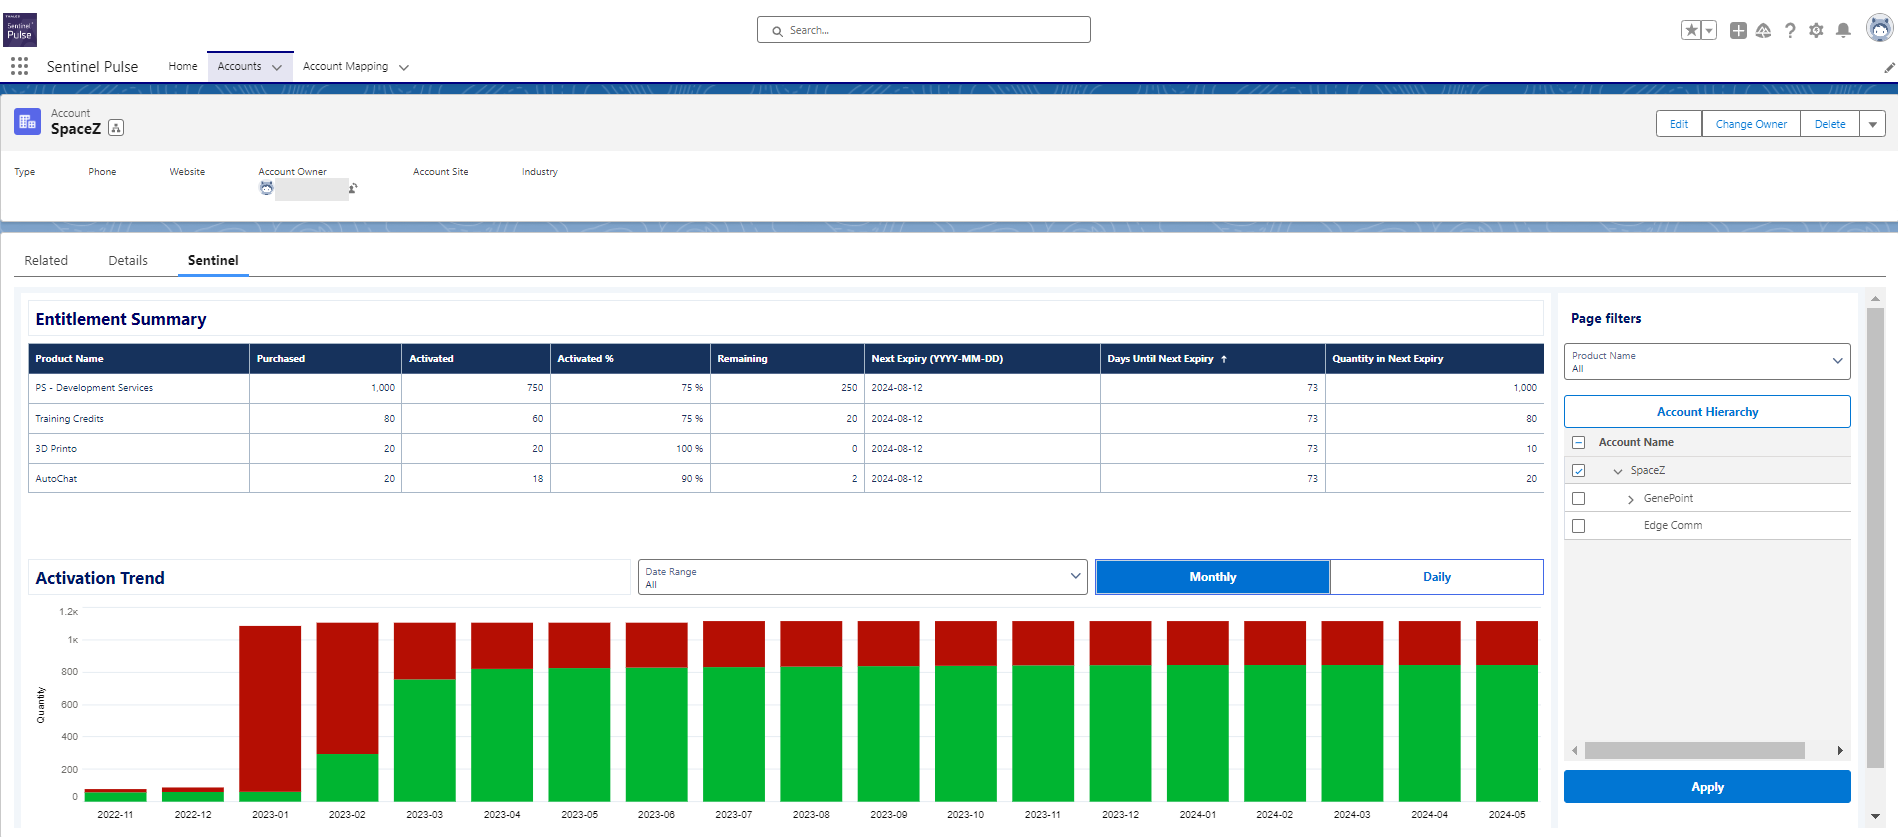
The following image illustrates the Sentinel Pulse Accounts page including the dashboards that are added to the page.