Getting Started with Sentinel Connect
|
This document guides you through the essential steps for integrating Sentinel Connect with Salesforce as your business system, enabling you to automate entitlement processing and synchronize data across systems. If you need assistance with other business systems, such as Microsoft Dynamics, SAP, or Zuora, contact your Thales sales representative. |
New to Sentinel Connect?
|
Prerequisites
•Sentinel Connect
•Access to Sentinel Connect
•Appropriate user accounts to create clients (tenants) and to perform configuration and operational tasks (for example, Thales Administrator, Customer Administrator, and Service Account access)
•Sentinel EMS
•A provisioned Sentinel EMS environment
•A Service Account for entitlement processing and synchronization
•Your Business System
•Business System Administrator access in your business system (for example, Salesforce)
•Permissions to install the Sentinel Connect connector (using the Sentinel Connect package in Salesforce), run the setup, configure mappings, and process orders
The Steps
Follow the steps below to establish a complete, end-to-end integration between Sentinel EMS and Salesforce for entitlement automation and data synchronization.
[Performed by the Thales Administrator.]
In this step, you set up the client (tenant) for the selected connector and configure its connection to your Sentinel EMS instance. Before completing the steps below, review the following Sentinel Connect User Guide topics, which describe the referenced options:
•Configuring Lookup Parameters
•Configuring Additional Configurations
1.Navigate to https://connect.sentinelcloud.com to open Sentinel Connect.
2.On the Client Management page, click Add Client.
3.In the Connector field, select the connector that you want to associate this client (tenant) with, for example, Salesforce.
4.Navigate to the Client tab.
5. In the Info pane, enter the onboarding details of the client as follows:
a.In the Name field, enter the name of the client (tenant), for example, DEMOCLIENT.
b.In the Email field, enter the email address of the client.
c.In the Client Code field, enter the code for the client. The code can have a maximum of four alphanumeric characters.
6.In the EMS Details pane, enter the Sentinel EMS credentials:
a.In the Username field, enter the username for the Sentinel EMS login.
b.In the Password field, enter the password for the Sentinel EMS login.
c.In the URL field, enter the Sentinel EMS portal URL shared by Thales.
d.Click Verify to validate the Sentinel EMS credentials.

7.Navigate to the Object Rules tab and review the default settings. These settings specify how Sentinel Connect processes incoming data from Salesforce.
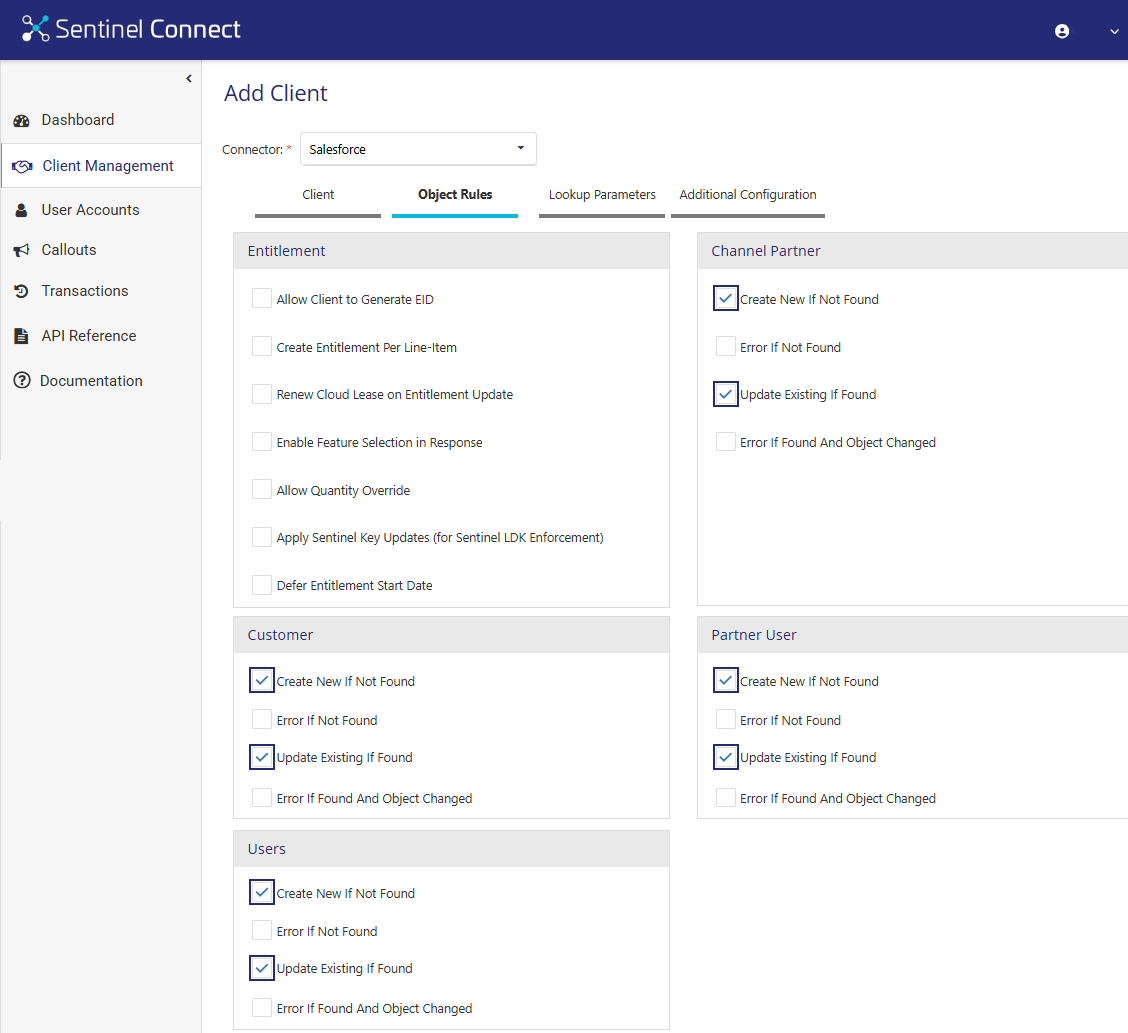
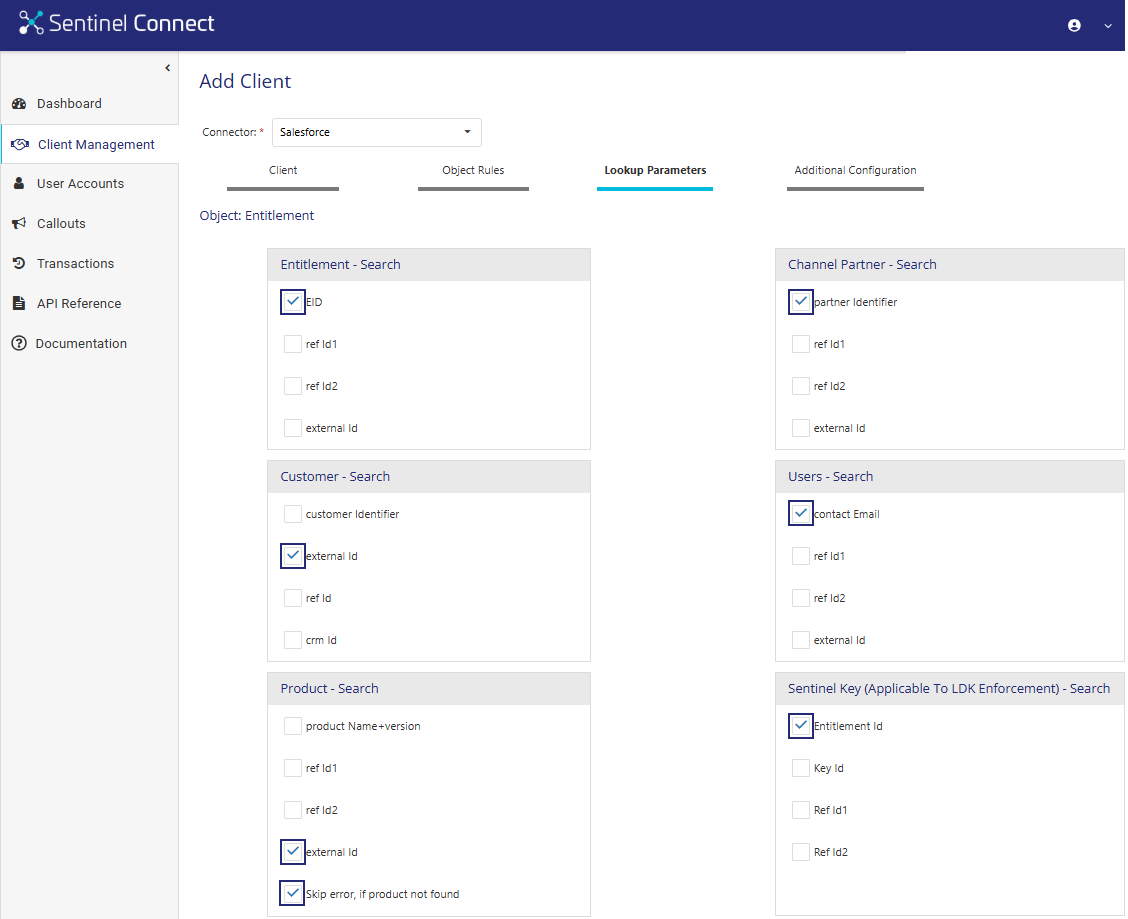
8.Navigate to the Lookup Parameters tab and review the default settings. These settings specify special parameters to cross-reference or look up data between systems. This helps ensure that the data is consistent and accurate during all automated transactions.
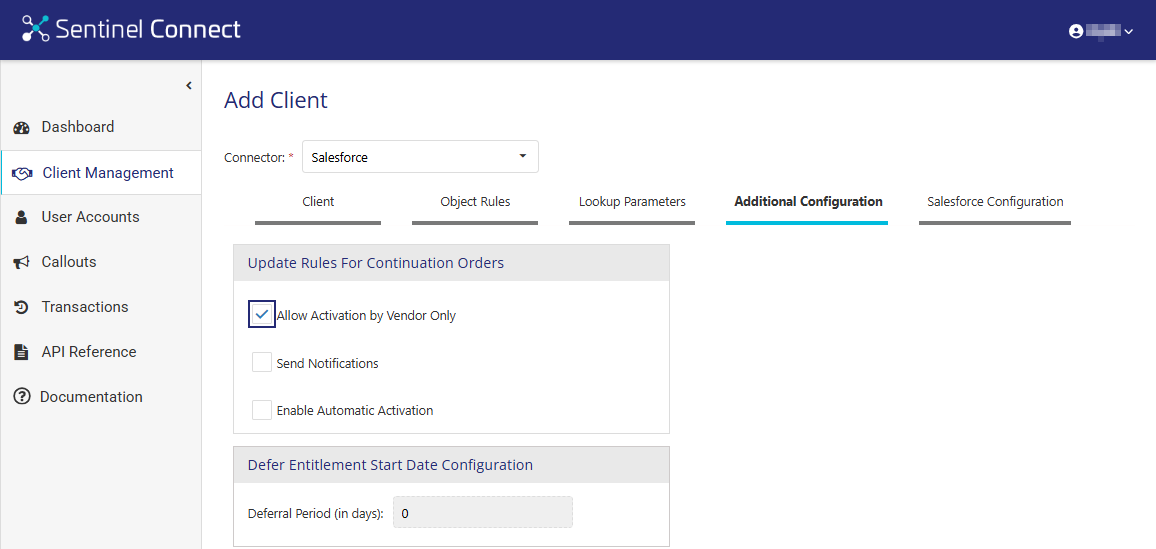
9.Navigate to the Additional Configuration tab to configure connector-specific settings.
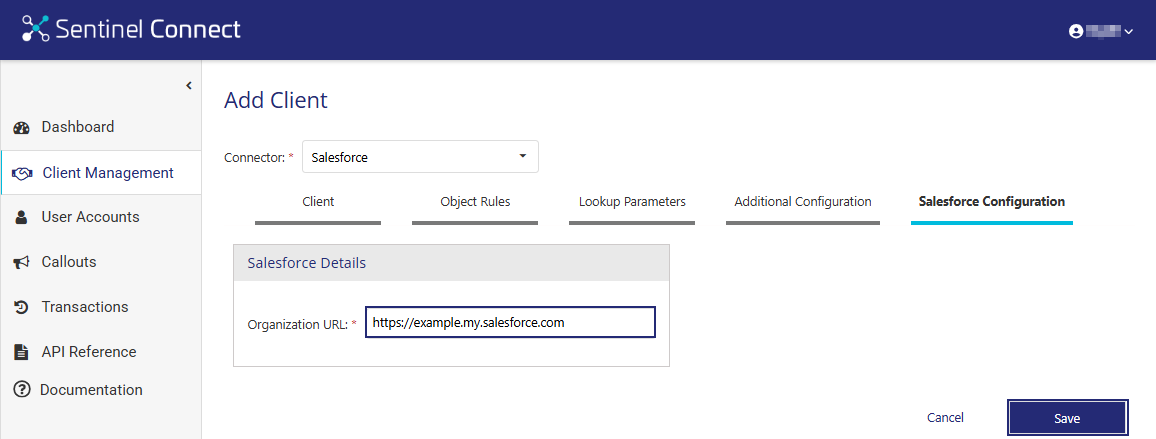
10.Navigate to the Salesforce Configuration tab.
11.In the Salesforce Details pane, enter the Organization URL of Salesforce.
To obtain the URL, follow these steps:
a.In Salesforce, navigate to Auth. Providers and locate the Callback URL.
b.Copy the Callback URL up to and including the .com extension. Do not include any subsequent paths. The copied URL value is the Organization URL.
12.Click Save to create a new client (tenant) in Sentinel Connect.
The newly created client is listed on the Client Management page.

After creating the client (tenant), the next step is to create two user accounts for that client (tenant) — a Customer Administrator Account and a Service Account. Before completing the steps below, review the following Sentinel Connect User Guide topic, which explains the fields and options used when adding user accounts:
[Performed by the Thales Administrator.]
A Customer Administrator manages users and client-specific configurations for their assigned client (tenant).
1.Open Sentinel Connect.
2.Navigate to User Accounts > Add User Account.
3.In the Credentials pane, enter the user account details as follows:
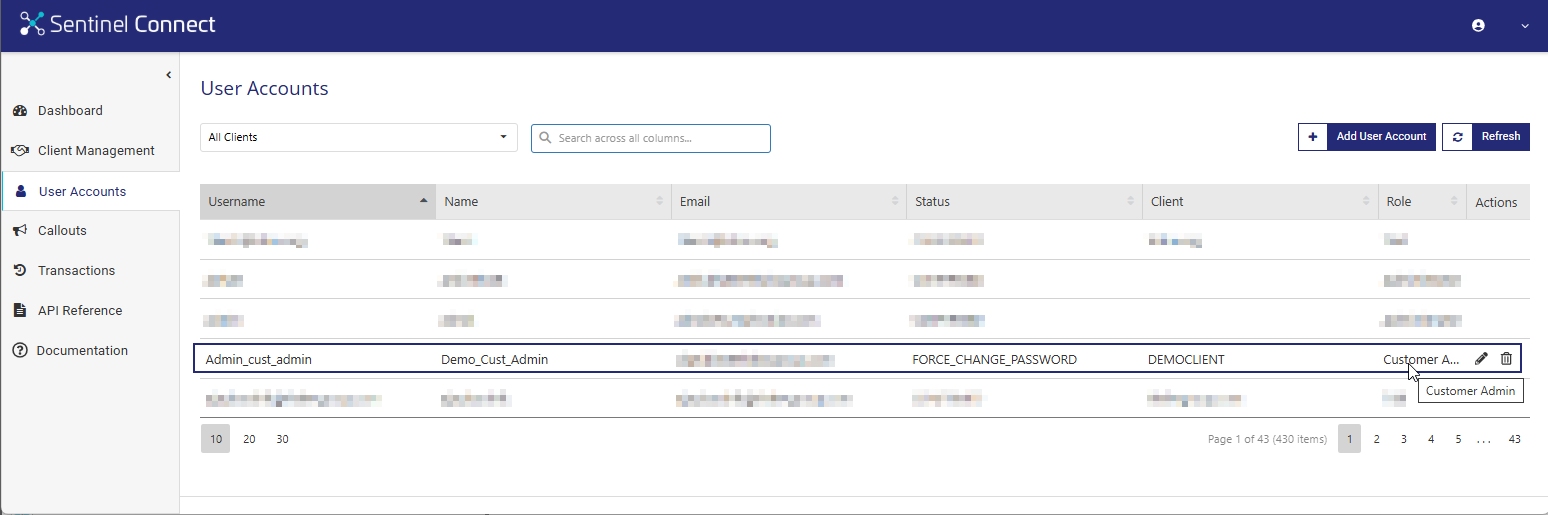
a.In the Username field, enter the username, for example, Admin_cust_admin, to log in to Sentinel Connect.
b. In the Role field, select Customer Admin.
c.In the Client field, select the appropriate client (tenant) for the user, for example, DEMOCLIENT.
4.In the Personal Data pane, enter the contact information.
5.Click Save to create a Customer Administrator Account.

The newly created user is listed on the User Accounts page. The status for the new user account is FORCE_CHANGE_PASSWORD. This means the user must change the default password at the first login, as described in the next step.
After the Customer Administrator Account is created, an activation email is automatically sent to the email address provided during setup. The recipient must complete the activation process before accessing Sentinel Connect.
1.Open Sentinel Connect using the link provided in the activation email.
2.Sign in with the username and the temporary password included in the email.

3.When prompted, reset the password to activate the account. This reset link expires in 2 minutes and 30 seconds.

After you activate the account, the Thales Administrator or the Customer Administrator can verify that the user account status is confirmed.
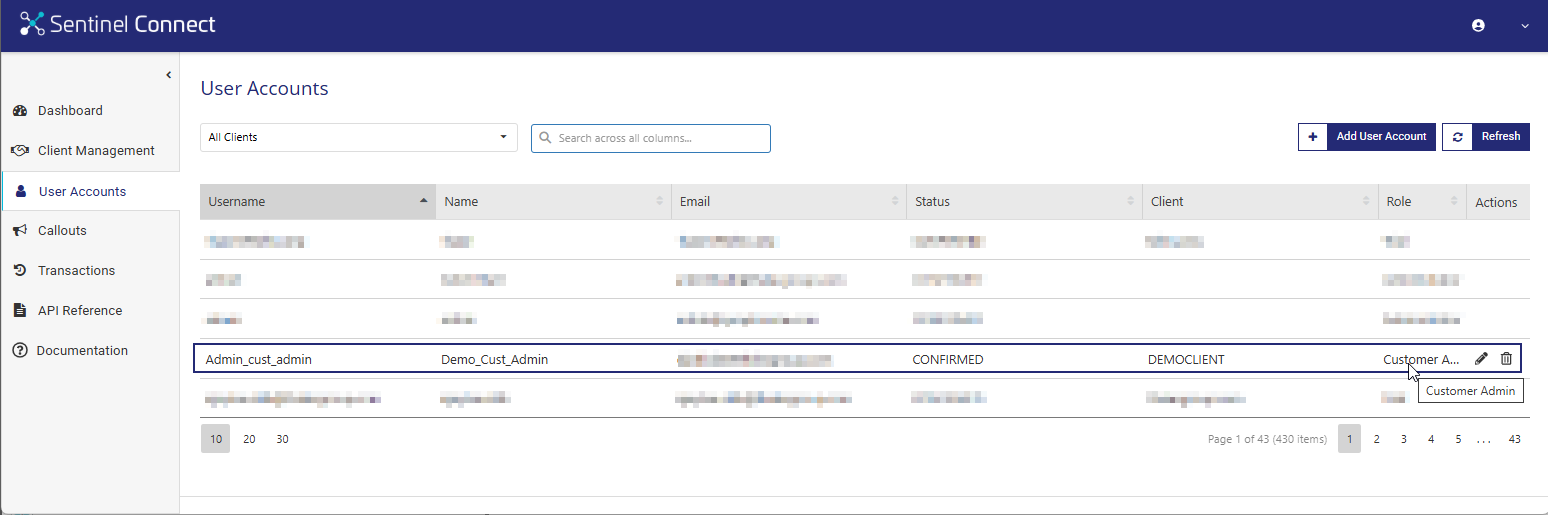
[Performed by the Thales Administrator or Customer Administrator.]
The Service Account is required for API-based automation and integration with business systems. This account is used for system-to-system communication and does not provide access to Sentinel Connect.
1.Open Sentinel Connect.
2.Navigate to User Accounts > Add User Account.
3.In the Credentials pane, enter the user account details as follows:
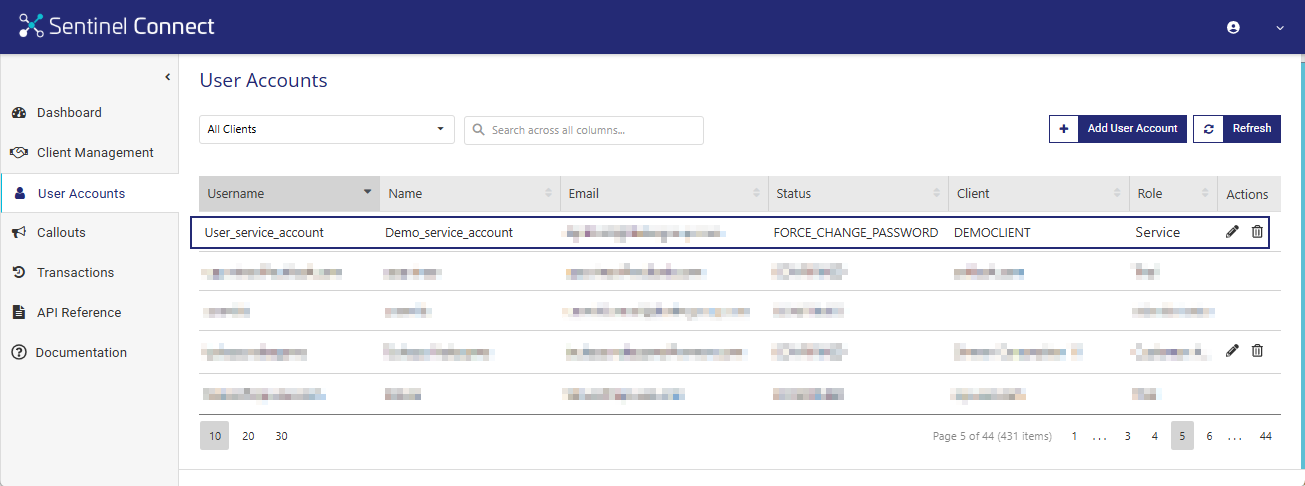
a.In the Username field, enter the username, for example, User_service_account, to log in to Sentinel Connect.
b. In the Role field, select Service.
c.In the Client field, select the appropriate client (tenant) for the user, for example, DEMOCLIENT.
4.In the Personal Data pane, enter the contact information.
5.Click Save to create a Service Account.

The newly created user is listed on the User Accounts page. The status for the new user account is FORCE_CHANGE_PASSWORD. This means the user must change the default password at the first login, as described in the next step.
After the Service Account is created, an activation email is automatically sent to the email address provided during setup. The recipient must complete the activation process before accessing Sentinel Connect.
1.Open Sentinel Connect using the link provided in the activation email.
2.Sign in with the username and the temporary password included in the email.

3.When prompted, reset the password to activate the account. This reset link expires in 2 minutes and 30 seconds.
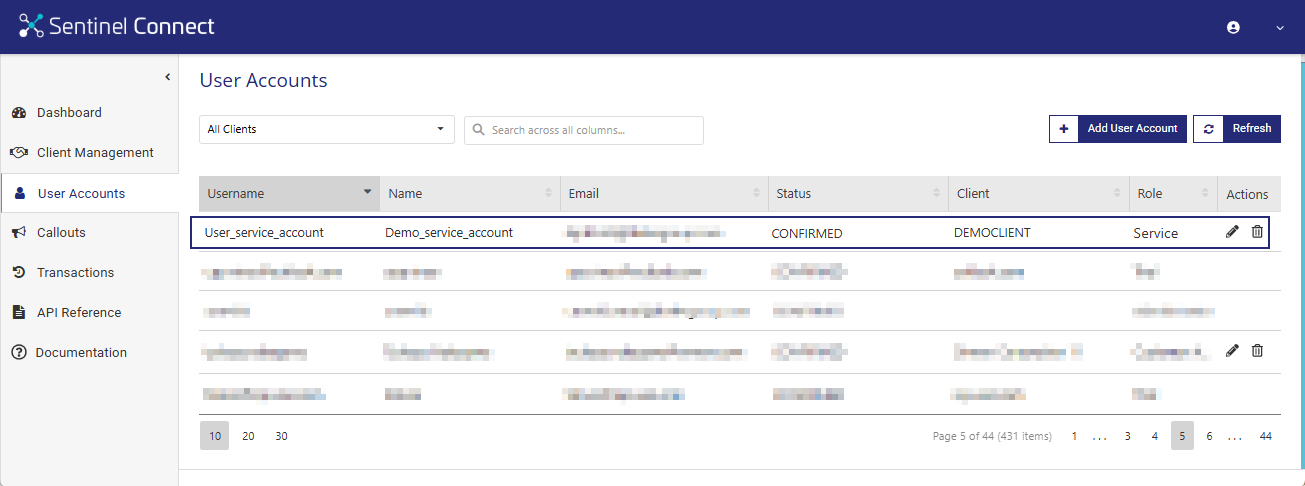
After you activate the account, the Thales Administrator or the Customer Administrator can verify that the user account status is confirmed.
[Performed by the Salesforce Administrator.]
In this step, you install the Sentinel Connect package in the Salesforce environment to integrate Salesforce with Sentinel EMS. The integration uses the Service Account created and activated earlier in step 2 for authentication during setup.
For prerequisites, supported versions, and detailed installation instructions, contact your Thales sales representative.
[Performed by the Salesforce Administrator.]
The Salesforce connector includes user-specific settings that govern the synchronization and processing of orders and quotes between Salesforce and Sentinel Connect. Before completing the steps below, review the following Sentinel Connect User Guide topic, which describes the Sentinel User Setting option:
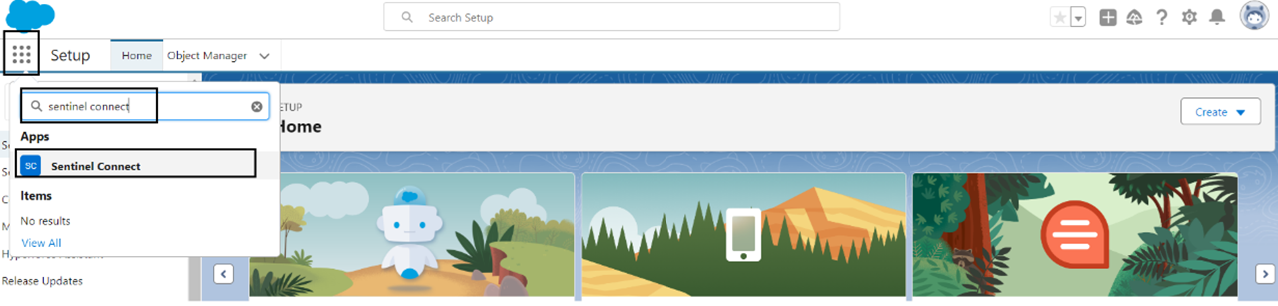
1.Sign in to Salesforce.
2.Select the App Launcher, search for Sentinel Connect, and open the Sentinel connect app.
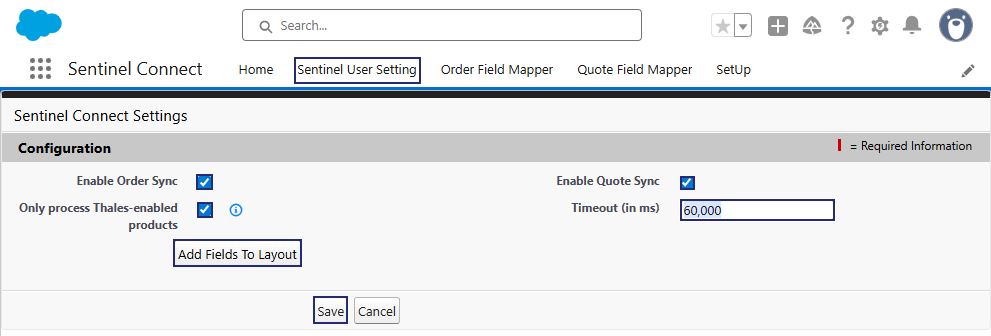
3.Navigate to the Sentinel User Setting tab and click Edit.
4.Select the Enable Order Sync and Enable Quote Sync checkboxes to allow users to access the connector functionality in Salesforce for order and quote synchronization.
5.Select the Only process Thales-enabled products checkbox.
This ensures that Sentinel Connect processes only the products with the Thales setting enabled in Salesforce.
6.In the Timeout (ms) field, enter 60000.
This ensures that when a Sentinel Connect request is initiated from this point, the system waits for a response up to the specified timeout value.
7.Click Add Fields To Layout.
8.In the Add Fields To Layout dialog box, select a layout from each drop-down list.
9.Click Add to complete the layout addition and you are redirected to the Sentinel User Setting tab.
This ensures that all required Sentinel Connect fields are consistently available for relevant Salesforce objects.
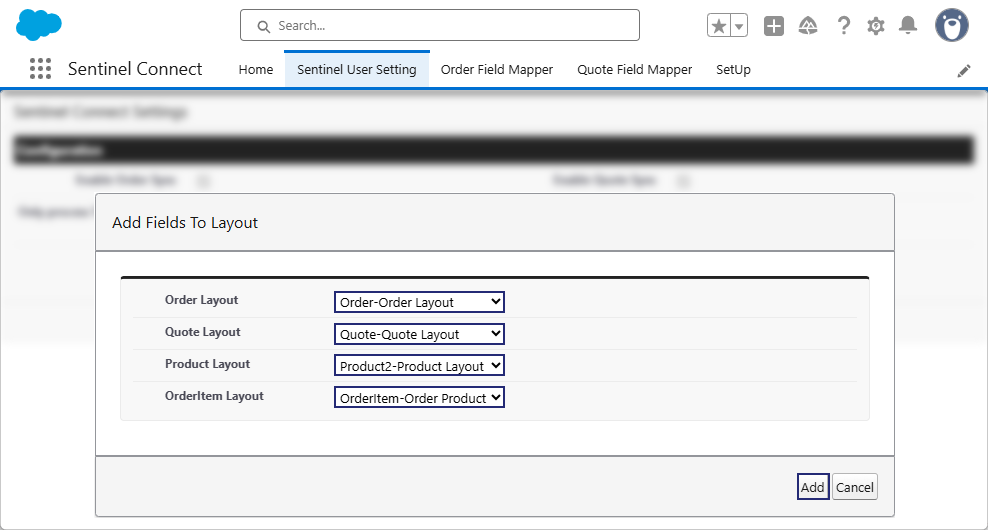
10.Click Save to save the Sentinel user settings.
[Performed by the Salesforce Administrator.]
The SetUp tab performs a one-time configuration required to enable Sentinel Connect functionality for Quotes. Before completing the steps below, review the following Sentinel Connect User Guide topic, which explains how to enable quotes:
NOTE This step is required only for non-CPQ Salesforce packages.
1.In the Sentinel Connect app (in Salesforce), navigate to the SetUp tab.
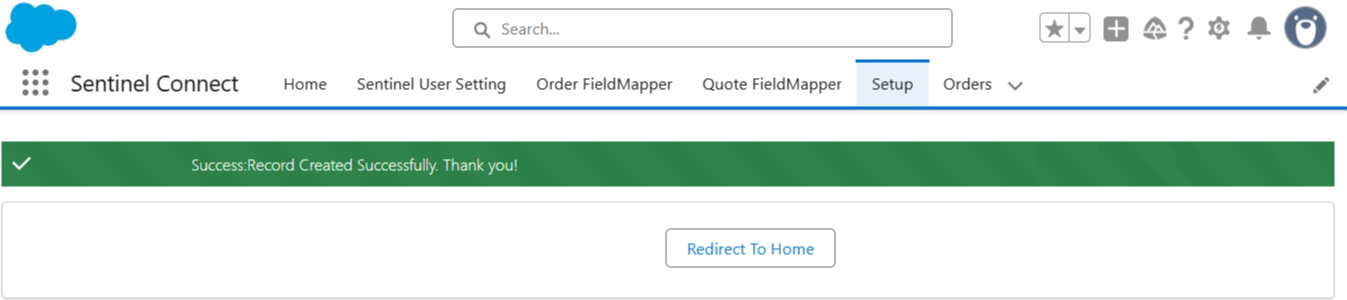
2.Click Initial Setup.
This creates all required quote-related components, enabling Sentinel Connect to integrate with Salesforce Quotes.
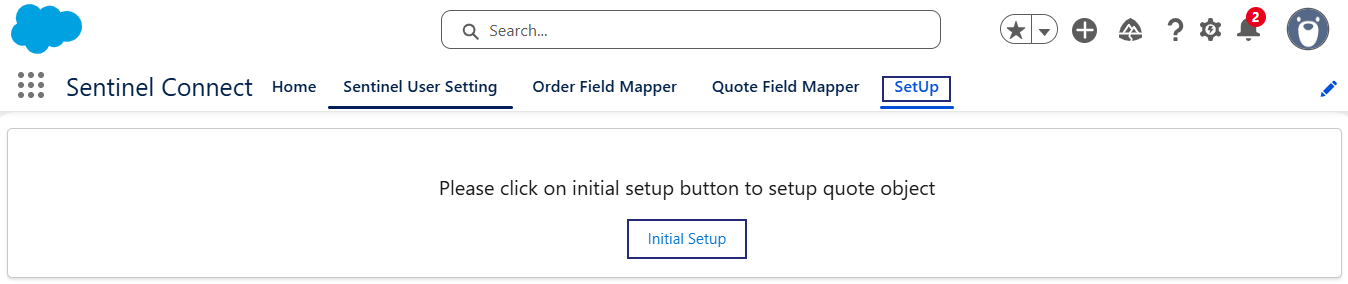
After the setup completes, Salesforce displays the updated screen as shown.
[Performed by the Salesforce Administrator or Sentinel Connect Customer Administrator.]
In this step, you define field mappings in Salesforce to control how order data is sent to Sentinel Connect for entitlement processing. Before completing the steps below, review the following Sentinel Connect User Guide topic, which describes how to access the Field Mapper:
[Performed by the Salesforce Administrator or Sentinel Connect Customer Administrator.]
In this step, you define field mappings in Salesforce to control how order data is sent to Sentinel Connect for entitlement processing.
1.Sign in to Salesforce.
2.From the App Launcher, open the Sentinel Connect app.
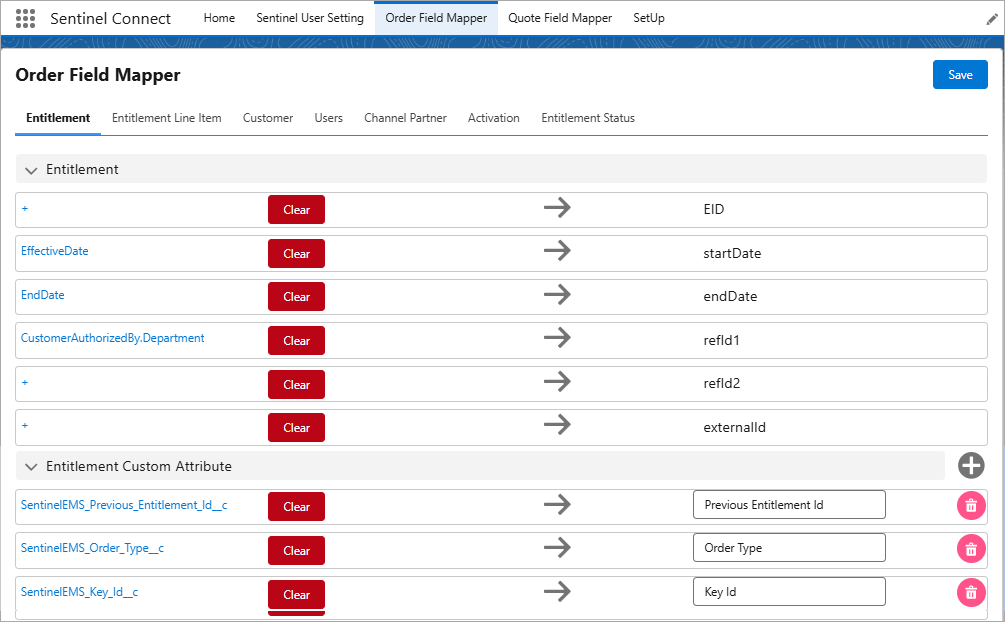
3.In the search field, navigate to the Order Field Mapper.
4.Proceed with mapping the data fields.
NOTE The Entitlement Status defined in the Order Field Mapper tab controls whether the order is triggered when you select Activated and Mark as Current Status in Step 7: Process Orders and Entitlements.
In this step, you process a test order in Salesforce and verify that Sentinel Connect successfully processes the order and synchronizes the corresponding entitlements. Before completing the steps below, review the following Sentinel Connect User Guide topic, which explains how to make products Thales-enabled:
In this step, you process a test order in Salesforce and verify that Sentinel Connect successfully processes the order and synchronizes the corresponding entitlements.
1.Sign in to Salesforce.
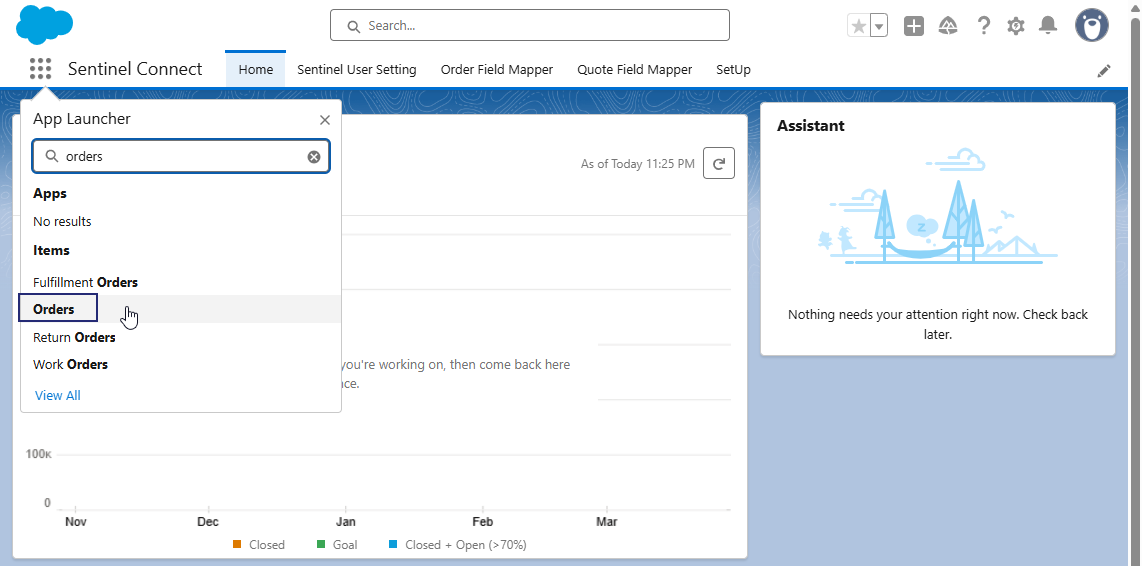
2.From the App Launcher, open the Sentinel Connect app.
3.In the search field, enter orders, and then select Orders.
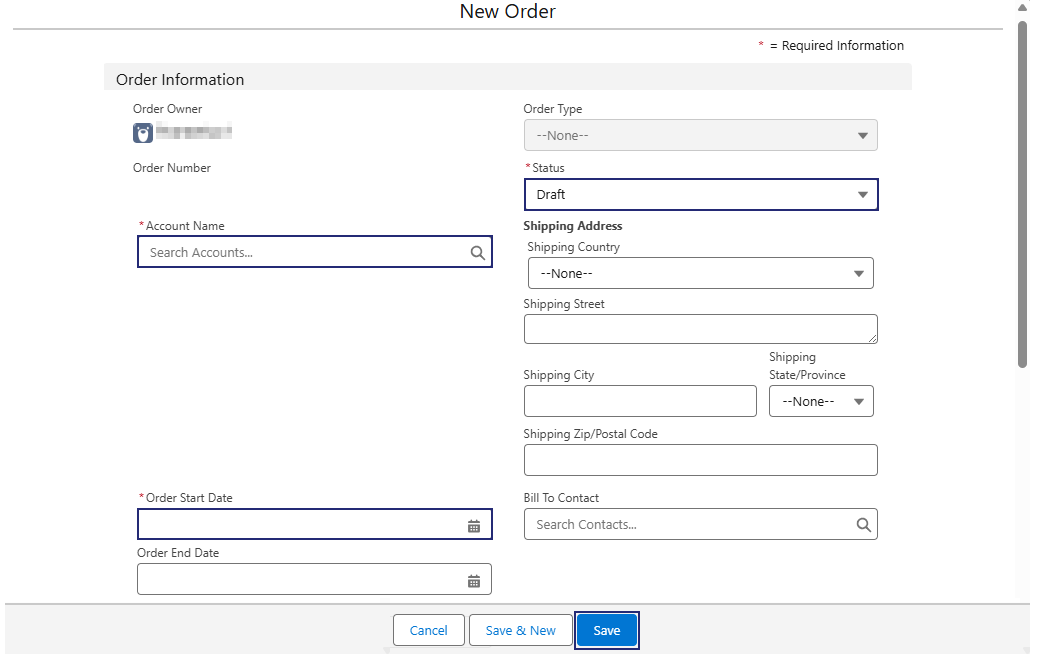
4.In the Orders tab, click New Order.
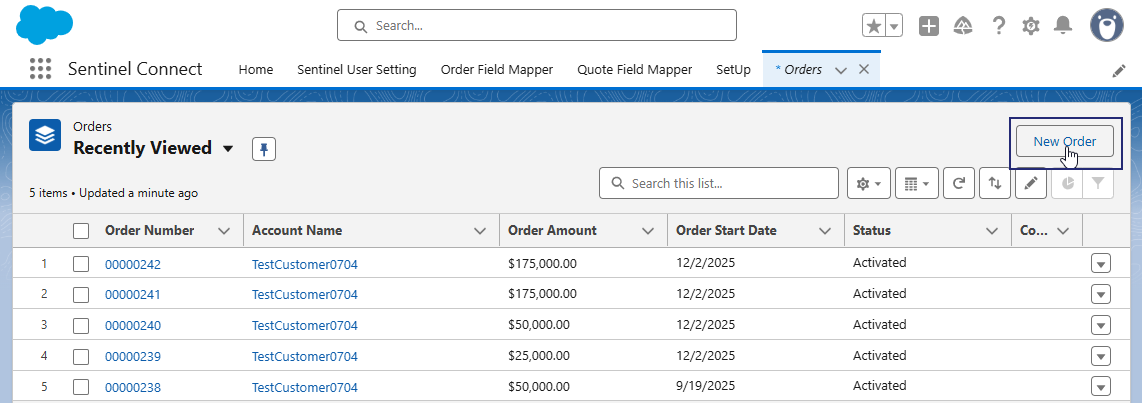
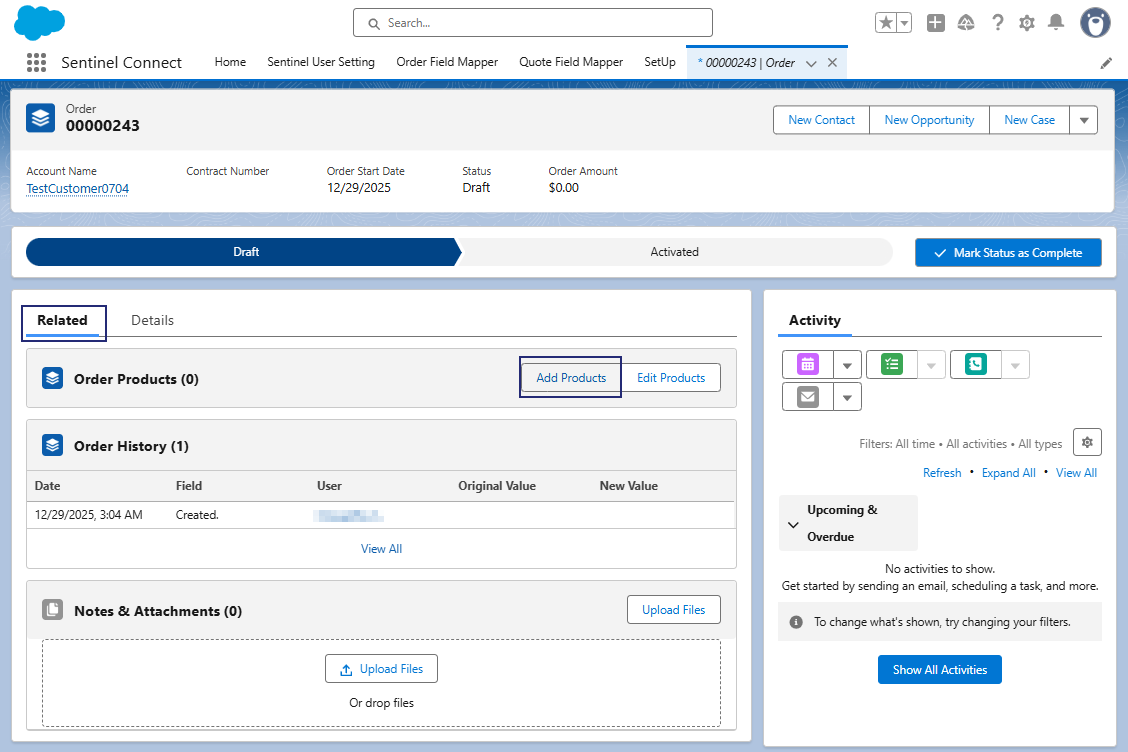
5.In the New Order screen, fill in the order information and click Save. A draft order is saved and you are redirected to the Orders tab.
6.In the Related tab, click Add Products to add products to the draft order.
7.In the Add Products screen, select one or more products to add to the order and click Next.
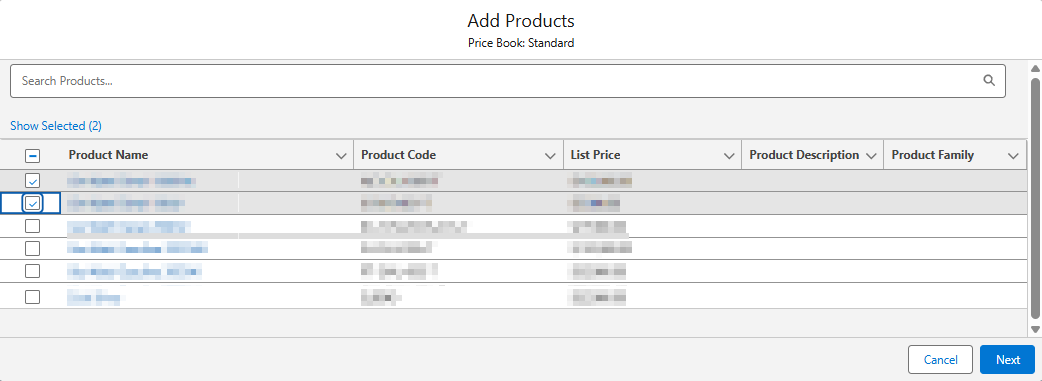
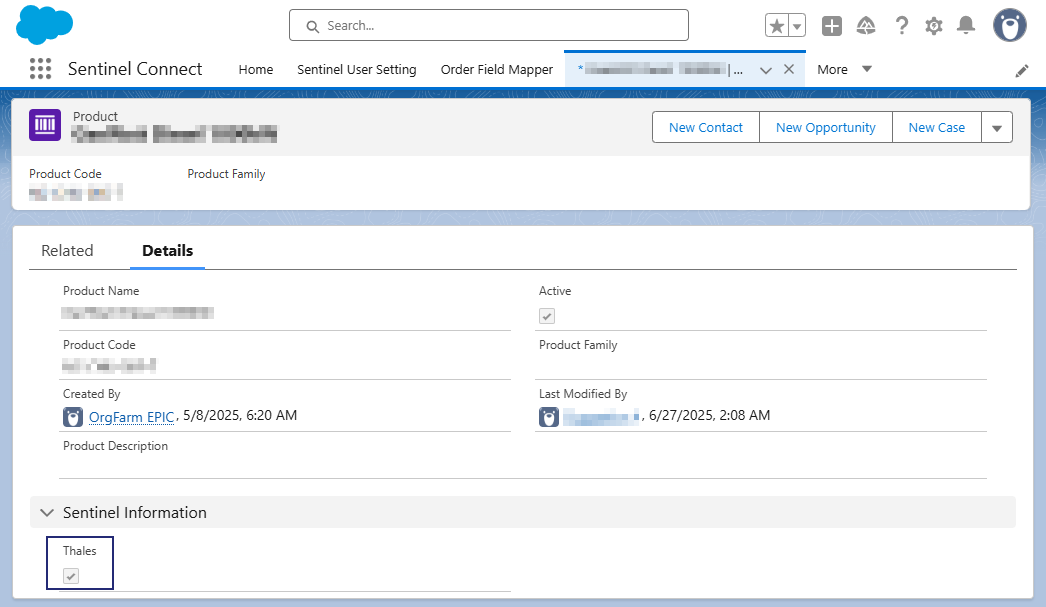
NOTE Ensure that the selected products are Thales-enabled. To do this, select the Thales checkbox in the Sentinel Information pane when adding a new product or editing an existing product.
8.In the Edit Selected Order Products screen, specify the Quantity; the Unit Price and List Price are already filled.
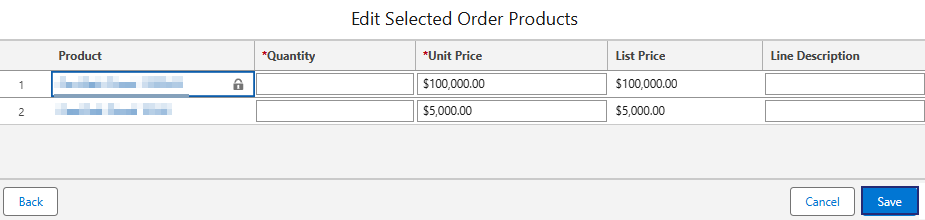
9.Click Save to save the order. The order is currently saved as a draft.
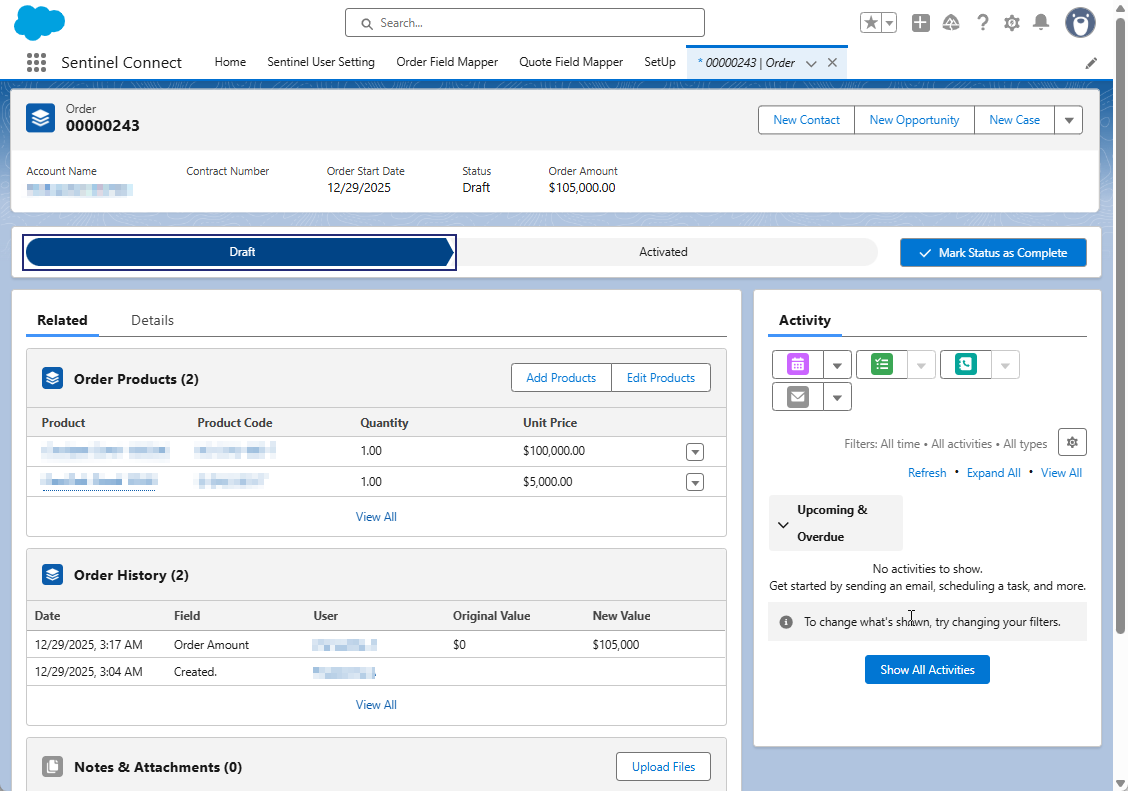
10. Click Activated and then click Mark as Current Status. The order is now triggered from Salesforce and sent to Sentinel Connect.
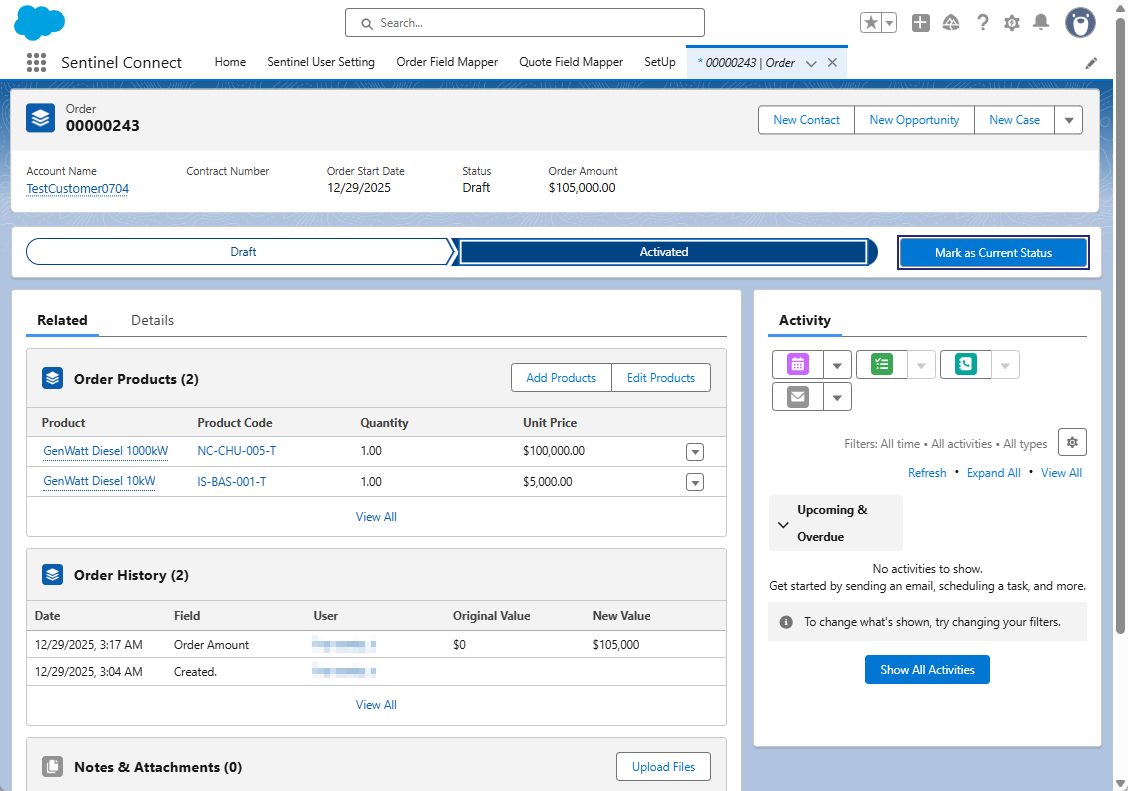
Sentinel Connect receives the order and starts processing the entitlement.
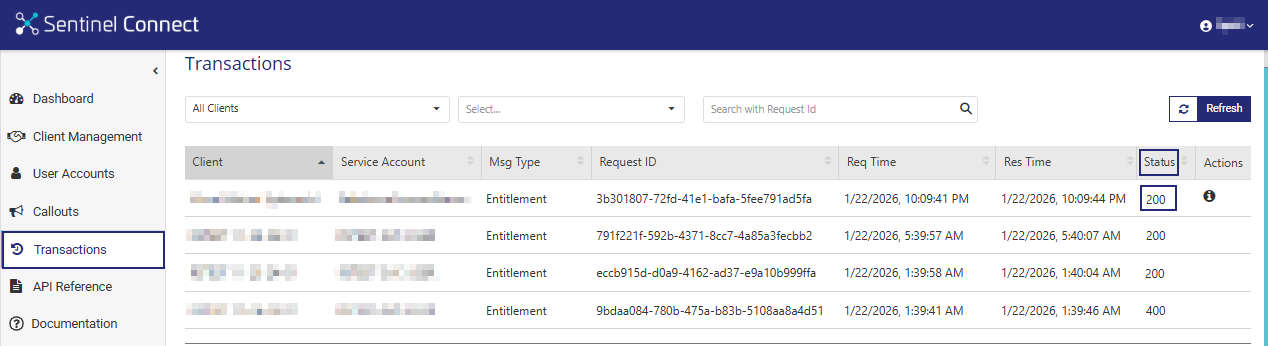
11. Open Sentinel Connect.
12. Navigate to Transactions and confirm that the order status indicates successful processing. An HTTP status code of 200 indicates a successful transaction.
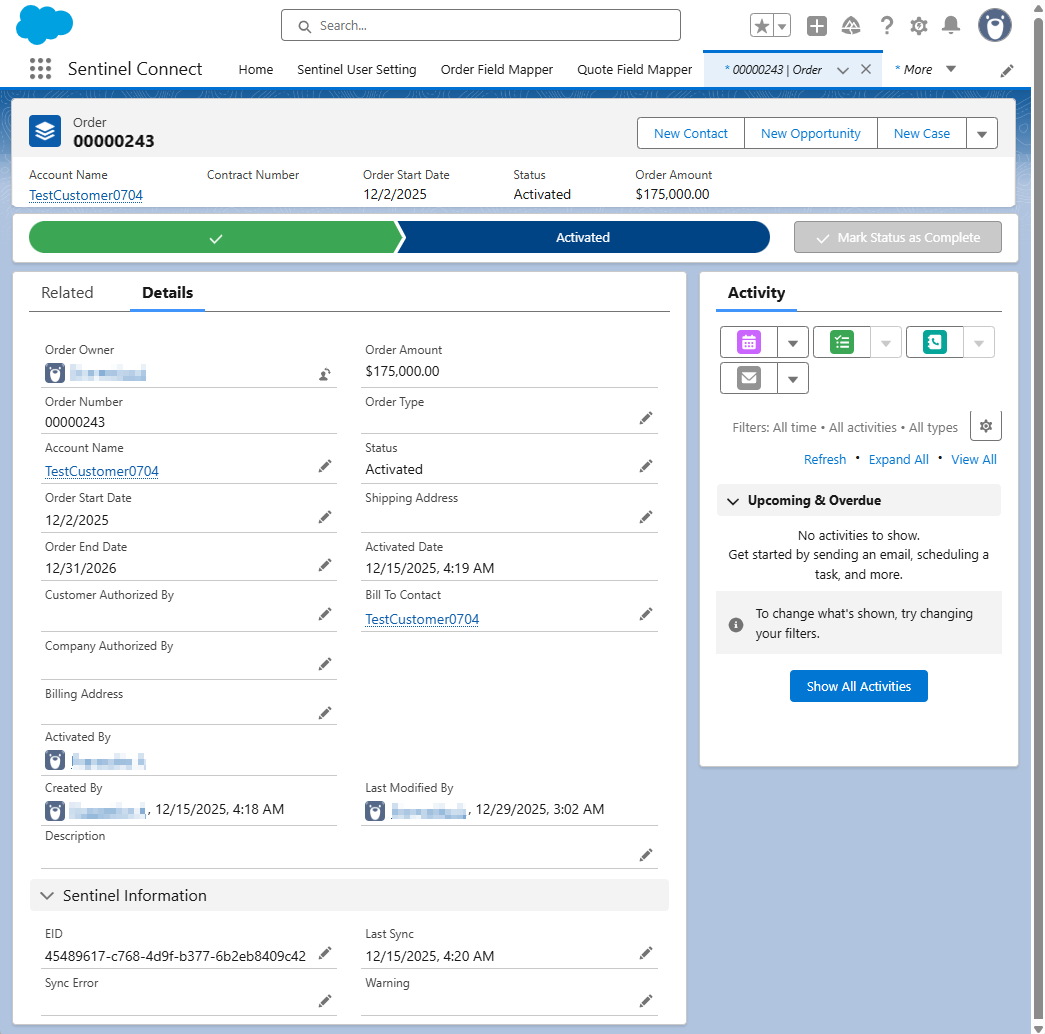
13. In the Sentinel Connect app (in Salesforce), navigate to Orders, and select the Details tab.
14. In the Sentinel Information pane, verify that the EID field now contains a value. This indicates that the order was processed and synced successfully. If an error occurs, the Sync Error field displays a value instead.
Sentinel Connect returns the unique entitlement identifier (EID) from Sentinel EMS to the target application.
Congratulations! You have completed an end-to-end integration of Salesforce with Sentinel EMS using Sentinel Connect, including order processing and entitlement synchronization.