Sentinel Pulse Notifications
You can use the Notifications tab to create proactive alerts on Sentinel Pulse data and receive them in-app within Salesforce and by email associated with your Salesforce account, enabling data-backed sales and customer success decisions.
You can create alerts based on all data attributes available in the Product Engagement tab and identify which accounts meet the configured thresholds.
Prerequisites
Ensure that the Notifications tab is added in the Sentinel Pulse app and the notifications scheduling jobs are configured and running in your org. For setting up notifications, system administrators can refer to: Setting up Advanced Notifications
Using the Notifications Tab
Using the Notifications tab you can:
>Create notifications based on entitlement metrics such as Product Name, Purchased, Activated, Remaining, or Days Until Next Expiry.
>Define one or more conditions that trigger alerts.
>Preview data that matches the configured conditions before saving the notification.
>Receive in-app and email notifications when configured conditions are met.
To create a notification:
1.From the Sentinel Pulse navigation bar, click Notifications.
![]()
2.Click Add Notifications.

3.In the Notification Name field, enter a meaningful name such as: Low Remaining Quantity, Upcoming License Expiry, Churn Risk, or High Activation Usage.
NOTE The Data Source is fixed as Entitlement Data.
4.From the Attribute list, select the entitlement attribute to monitor.
5.From the Operator list, select the comparison operator.
6.In the Value field, enter the value to compare against.
7.Click Add Condition to add additional conditions, if required.
NOTE Each notification must include at least one condition. All configured conditions must be met for the notification to trigger.
8.To remove a condition, click the Delete icon next to the condition row.
Examples:
| Attribute | Operator | Value | Notes |
|---|---|---|---|
| Days Until Next Expiry | Less than (<) | 30 | Identifies products nearing expiry. |
| Activated % | Greater than (>) | 90 | Tracking near-full consumption. |
| Remaining | Equals | 0 | Detects exhausted entitlements. |
To preview notification results:
1.Click Preview to view the data that currently matches the configured conditions.
2.Review the results in the table to validate your configuration.
3.Optionally, click Export CSV to download the preview data.
To configure notification frequency:
1.Frequency: Select how often the notification should be evaluated:
–Daily
–Weekdays
–Weekly
2.Notification Time: Select the local time (based on the timezone configured for the current user) at which the notification is sent.
3.Click Save to create the notification. Click Cancel to discard your changes.
Notes:
>Notifications are generated only when the scheduled notification jobs run and all configured conditions are met.
>Only system administrators can view notifications created by all users in the Notifications tab. Other users can view only the notifications they created.
>Notification frequency and notification time can be modified only by the notification owner. An administrator can modify the remaining details, such as the notification name and conditions (attribute, operator, and value), or delete the notification.
Managing Notifications
Use the Notifications page to view, manage, and monitor all notifications created in Sentinel Pulse. This page helps you track details such as when notifications run, who owns them, and when they were last updated—so you can stay informed and take timely action.

Page Actions and Controls
You can perform the following actions:
>Add Notification: Click Add Notification to create a new notification.
>Search notifications: Use the Search box to find notifications by name.
>Filter by owner: Narrow the list to notifications created by a specific user.
>Edit: Modify an existing notification using the Edit icon.
>Delete: Delete a notification using the Delete icon
>Pagination controls: Navigate through multiple pages of notifications, if available.
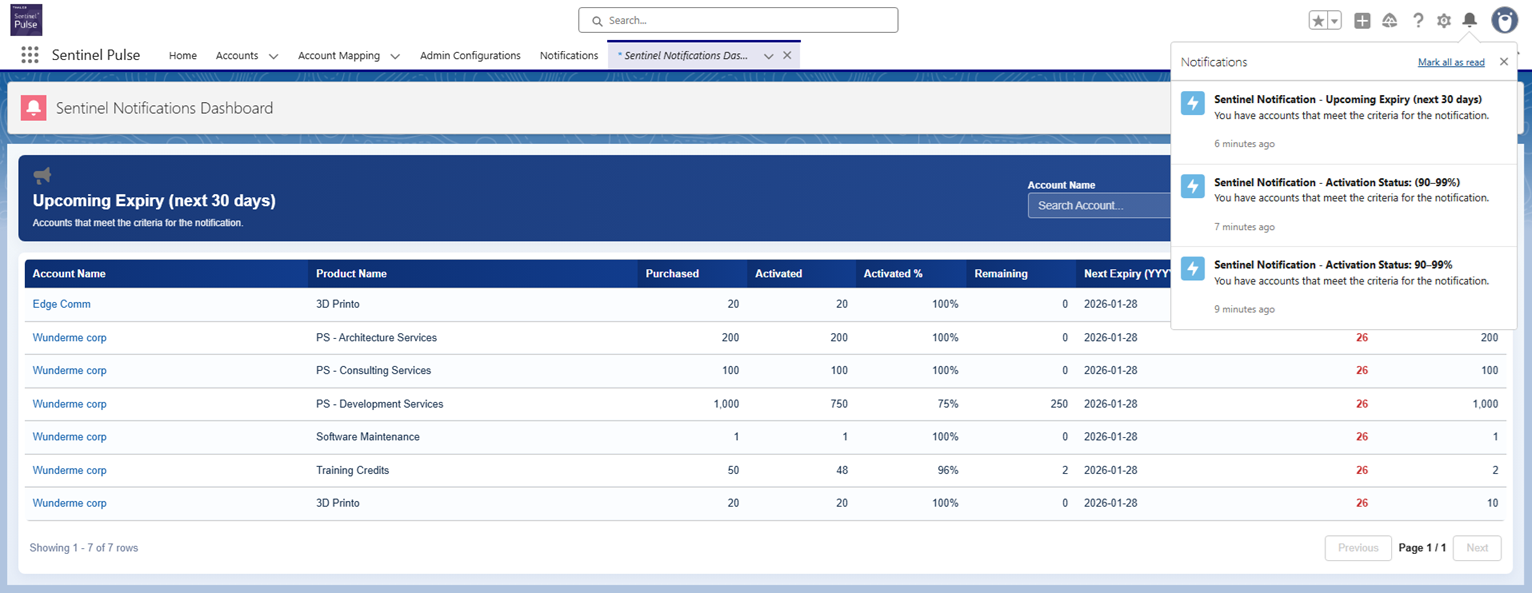
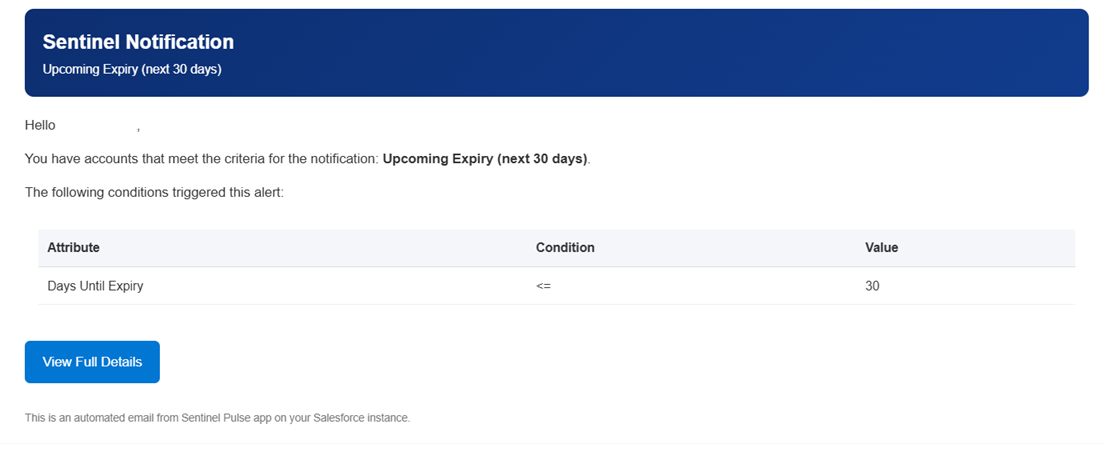
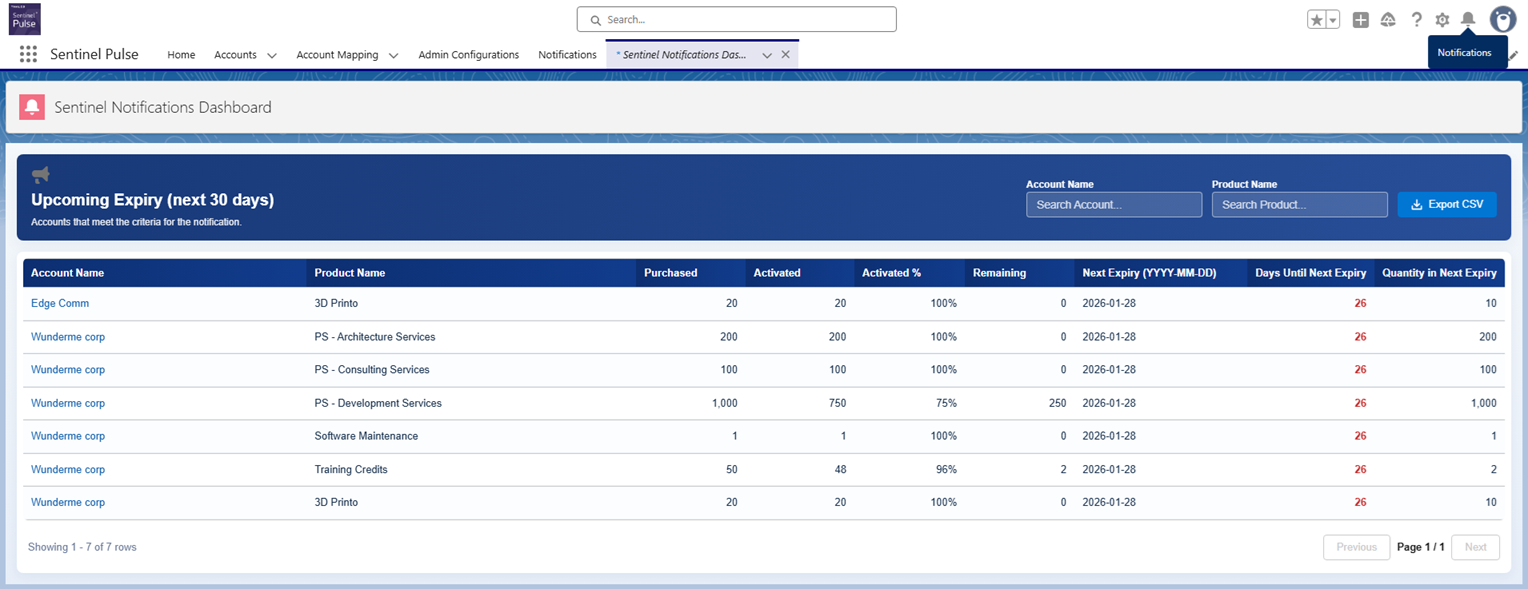
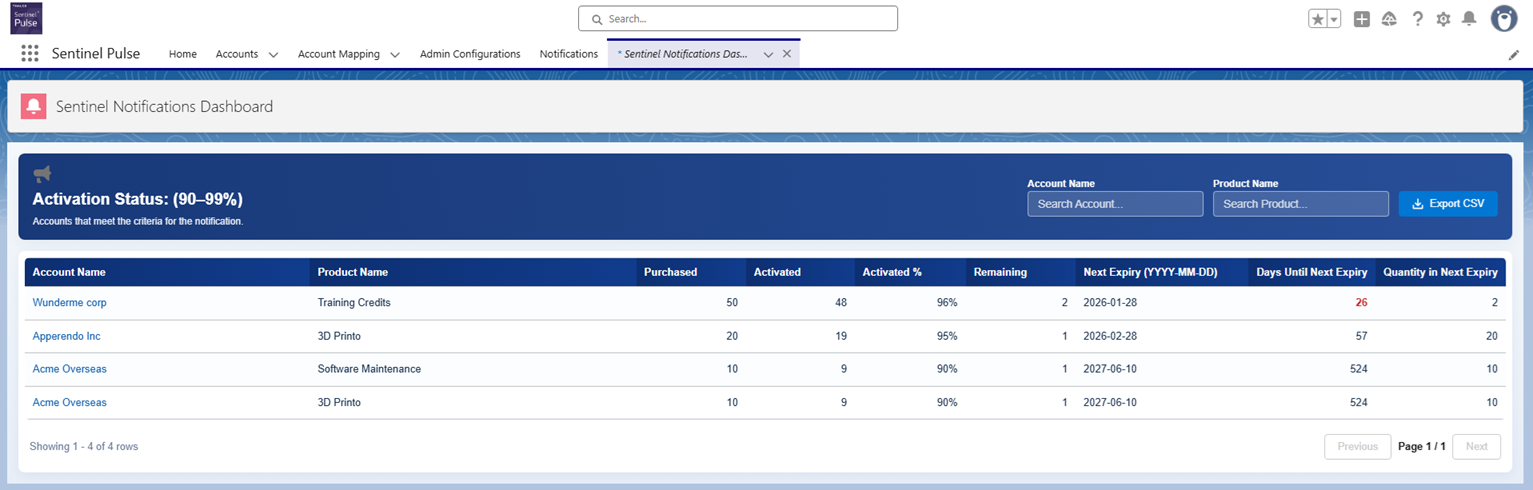
In-app Notifications and Email
When all configured conditions are met, the bell icon in the header displays in-app notifications generated by Sentinel Pulse. A badge appears on the icon when new notifications are available. Sentinel Pulse also sends an email to the account owner associated with the account.
The following screenshots show few examples of notifications: