Getting Started with the Customer Portal
The customer portal is a web-based solution that offers an easy-to-use interface for license management. You can use the customer portal to activate your products
Logging In
Sentinel EMS provides the following options to log in to the customer portal. You might see one or more of these options depending on the configuration.
>Entitlement ID: Log in using an entitlement ID (EID) that was sent to you by email. For details, see Login Using EID.
>Product Key ID: Log in using the product key ID (PKID) that was sent to you by email. For details, see Login Using PKID.
> User Credentials: Log in using the credentials (user ID or email address and password) that you received by email. For details, see Login Using User Credentials.
NOTE
>The various login types (Entitlement ID, Product Key ID, and User Credentials) are displayed only if the customer portal is configured to display these login types.
>The Update Licenses option is available on the login screen only for specific users. For details, see Update Licenses.
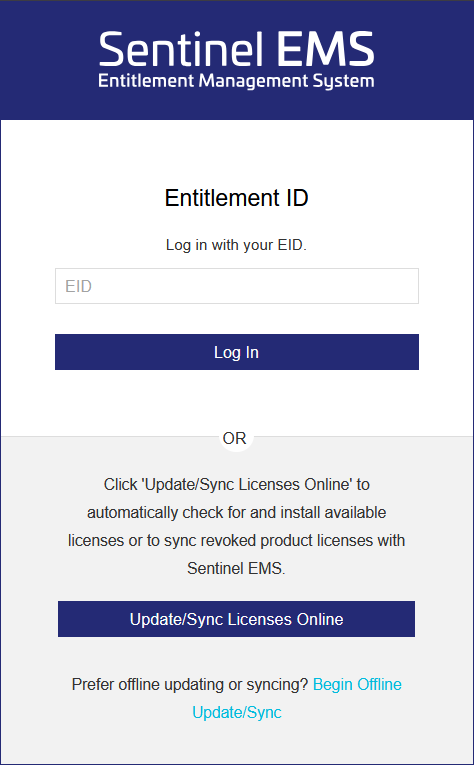
Login Using EID
To log in to the customer portal using an EID:
1.In the address bar of a web browser, enter the Sentinel EMS customer portal URL and press Enter. The login page opens.
NOTE
>The various login types (Entitlement ID, Product Key ID, and User Credentials) are displayed only if the customer portal is configured to display these login types.
>The Update Licenses option is available on the login screen only for specific users. For details, see Update Licenses.
2.In the EID box, enter the EID that you received by email.
3. Click Log In.
After logging in using EID, you can perform the following functions:
>View entitlement certificates
>Download product-related information
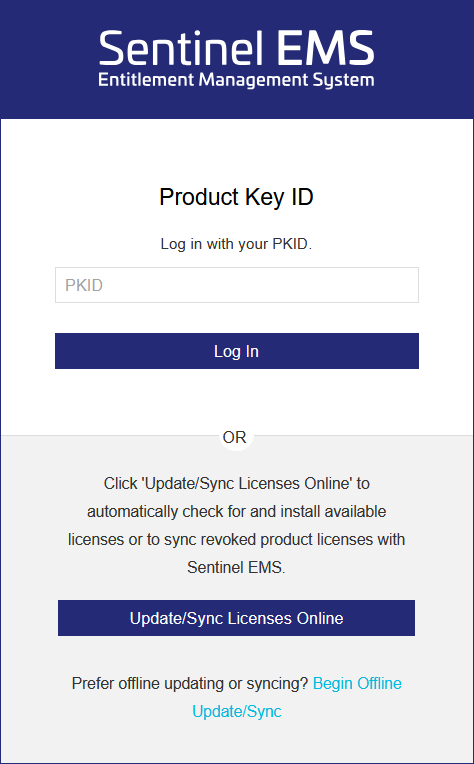
Login Using PKID
To log in to the customer portal using a PKID:
1. In the address bar of a web browser, enter the Sentinel EMS customer portal URL and press Enter. The login page opens.
NOTE
>The various login types (Entitlement ID, Product Key ID, and User Credentials) are displayed only if the customer portal is configured to display these login types.
>The Update Licenses option is available on the login screen only for specific users. For details, see Update Licenses.
2.In the PKID box, enter the PKID (product key) that you received by email.
3. Click Log In.
After logging in using PKID, you can perform the following functions related to the product key:
>View entitlement certificates
>Download product-related information
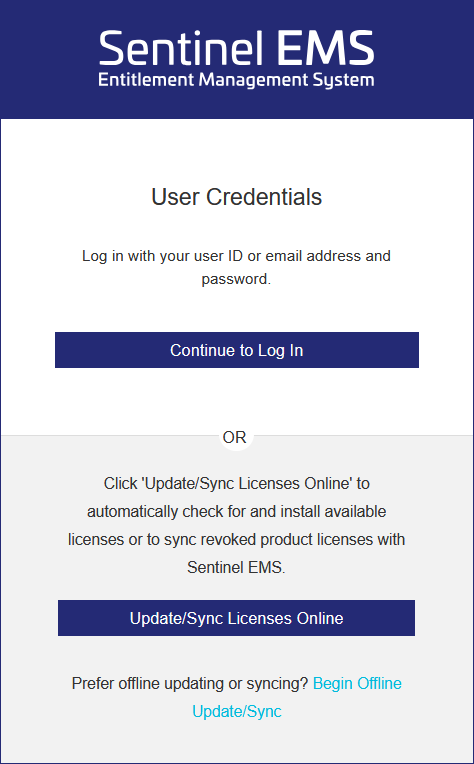
Login Using User Credentials
To log in to the customer portal using user ID or email address and password:
1.In the address bar of a web browser, enter the Sentinel EMS customer portal URL and press Enter. The login page opens.
If the following screen is displayed, click Continue to Log In. Otherwise, skip to step 2.
NOTE
>The various login types (Entitlement ID, Product Key ID, and User Credentials) are displayed only if the customer portal is configured to display these login types.
>The Update Licenses option is available on the login screen only for specific users. For details, see Update Licenses.
2.Enter your credentials (user ID or email address and password).

3. Click Log In.
If your account is configured to require a password change when you log in tor the first time, you must update your password before accessing the customer portal. In this case, you are prompted to update your password after first login.
Even if password change on first login is not enforced, it is recommended that you change your password after you log in for the first time.
It is also recommended to select the Remember me option to stay logged in across sessions for quicker access.
After logging in using your user credentials, you can perform the following functions:
>View and change profile information
>Entitlement search and advanced search
>View entitlement certificates
>Download product-related information
Password Change on First Login
If your account is configured to require a password change the first time you log in, the Update Password screen is displayed automatically after you log in successfully using your user credentials. You must update your password before you can access the customer portal.
NOTE This applies only to vendor users and customer users logging in using user credentials, and does not apply to channel partner users, or to login using EID or PKID credentials.
To update your password:
1.Enter a new password in the New Password field.
Passwords are case sensitive and must meet the following criteria:
> 8 to 30 characters
>Must include at least one lowercase character (a-z)
>Must include at least one uppercase character (A-Z)
>Must include at least one number (0-9) or special character (! @ # $ % ^ & * ( ) _ - + = , .)
2.Confirm your new password by typing it again in the Confirm Password field.
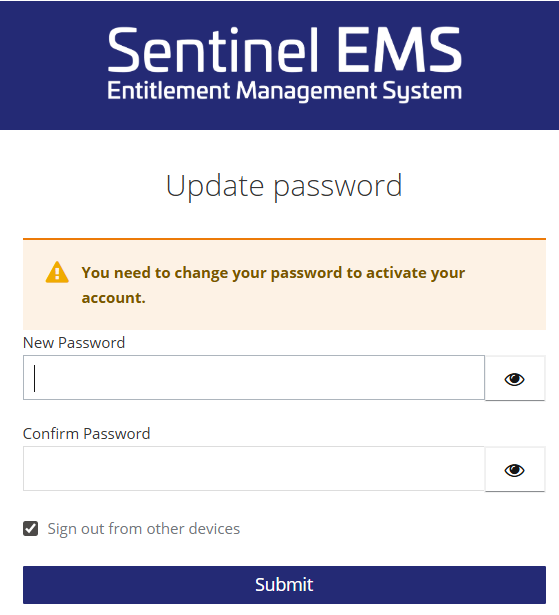
3.Click Submit.
Forgot Password?
You can reset your password using the Forgot Password? option available on the login page. This option is available only when you log in using your user credentials.
To reset your password:
1.On the login page, click Forgot Password?
2.On the screen that opens, enter the user ID or email address that was used during registration or received by email.
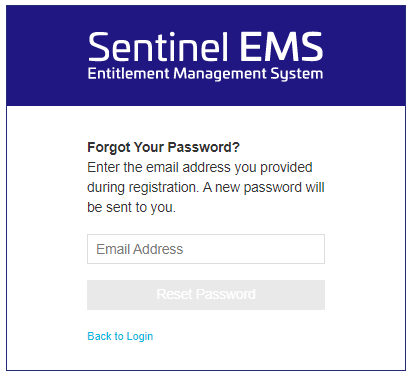
3. Click Submit. A secure link to reset the password will be sent to you through email.
NOTE If you do not remember the user ID or email address you provided during registration, contact your software vendor for help in recovering your user ID or email address and password.
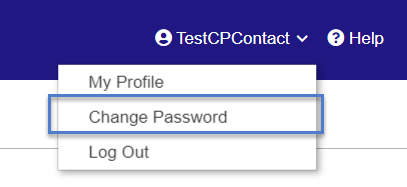
Change Password
After logging in to the customer portal using your user ID or email address and password, you can change your password.
NOTE If your account requires a password change on first login, you are prompted to update your password before accessing the customer portal. For more information, see Password Change on First Login .
To change your password:
1.Log in to the customer portal with your user ID or email address and password.
2.At the top-right corner of the page, click Change Password.
3.On the Change Password screen that opens, enter your current password in the Old Password field.
Passwords are case sensitive and must meet the following criteria:
> 8 to 30 characters
>Must include at least one lowercase character (a-z)
>Must include at least one uppercase character (A-Z)
>Must include at least one number (0-9) or special character (! @ # $ % ^ & * ( ) _ - + = , .)
5.Confirm your new password by typing it again in the Confirm Password field.
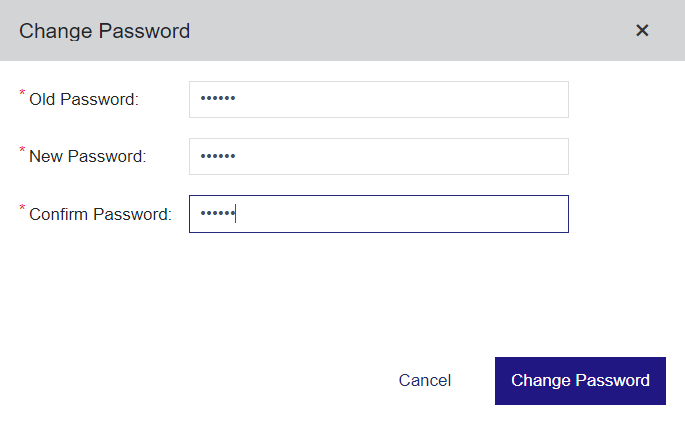
6.Click Change Password.
User Registration
The User Registration page may be displayed when you log in using an EID. This page is displayed based on whether user registration is mandatory, optional, or not required for your entitlements. If user registration is:
>Mandatory: You must provide registration details when logging on using the EID.
>Optional: You are prompted to provide the registration information but can choose to register later.
>Not Required: The user registration page does not appear.
To provide the registration information:
1.Log in using EID.
2.The User Registration page opens:
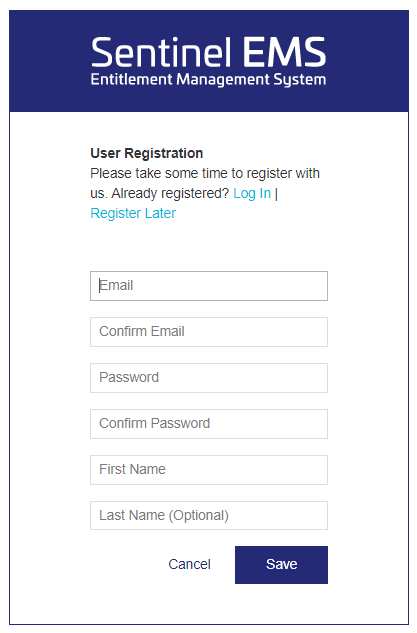
3.If you are already registered, click Log In to log in to the customer portal.
OR
If you want to register later, click Register Later.
OR
If you want to register now, enter information in the fields on the User Registration page. The following table describes the fields:
| Fields | Descriptions |
|---|---|
| Email Address | Email address. This is the email address used as part of the credentials to log in to the customer portal. |
| Confirm Email Address | Confirmation of the above email address. |
| Password |
Password that you use to log in to the customer portal. Passwords are case sensitive and must meet the following criteria: > 8 to 30 characters >Must include at least one lowercase character (a-z) >Must include at least one uppercase character (A-Z) >Must include at least one number (0-9) or special character (! @ # $ % ^ & * ( ) _ - + = , .) |
| Confirm Password | Confirmation of the above password. |
| First Name | First name. |
| Last Name (Optional) | Last name. |
4.Click Save.
Update Profile Information
You can update your profile information when you log in to the customer portal using your email address and password.
To update your profile information:
1.Log in to the customer portal with your email address and password.
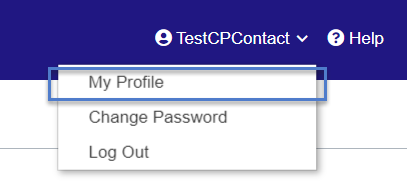
2.At the top-right corner of the page, click My Profile.
3.The Update Profile screen opens. Enter your details.
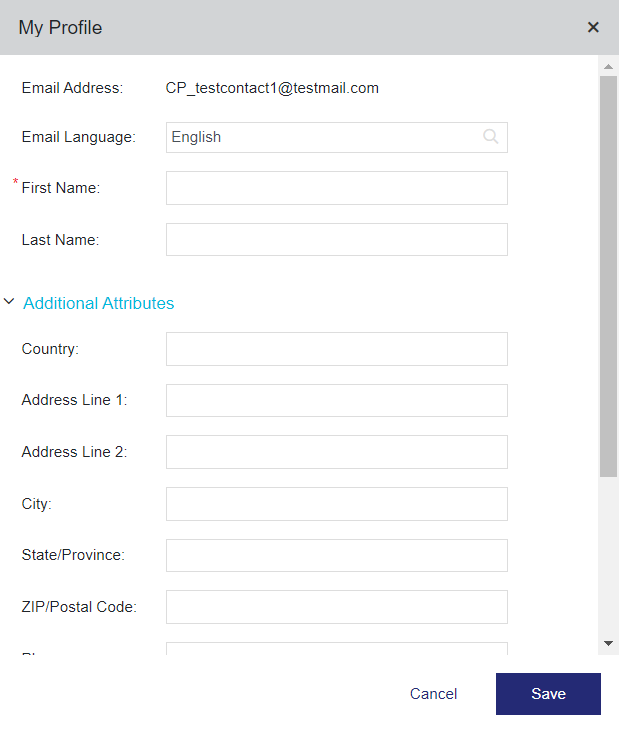
The following table lists the profile detail fields and their descriptions:
| Fields | Descriptions | Required/Optional |
|---|---|---|
| Email Address | Displays your email address. This is the email address used as part of the credentials to log in to the customer portal. | Required |
| Email Language |
Specifies your default email language for the customer portal. All emails and notifications are sent to you in this language. You can select a language from the available languages to specify a language other than English. The list of available languages displayed depends on the options provided by your software vendor. |
Required |
| First Name | Specifies your first name. | Required |
| Last Name | Specifies your last name. | Optional |
| Additional Attributes | ||
| Country | Specifies your country. | Optional |
|
Address Line 1 |
Specifies your address details. | Optional |
| Address Line 2 | Specifies additional address details. | Optional |
| City | Specifies your city. | Optional |
| State/Province | Specifies your state or province. | Optional |
| Zip/Postal Code | Specifies your ZIP or postal code. | Optional |
| Phone | Specifies your telephone number. | Optional |
| Fax | Specifies your fax number. | Optional |
| Company Name | Specifies your company name. | Optional |
| Company Website | Specifies the URL of your company website. | Optional |
NOTE Additional fields may be displayed on your screen if customizations were applied.
4.Click Save.