Getting Started with Sentinel LDK—Burning a License on a Hardware Key
Sentinel EMS combines with Sentinel LDK to provide a powerful, centralized, role-based solution for handling all of your software protection, licensing, and entitlement needs.
Sentinel EMS has a straightforward design that walks you through the process of defining the various features and products that match the features and products in your back office system (ERP, CRM, billing system, or sales system).
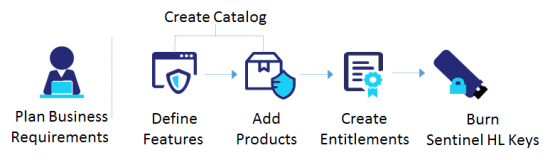
Sentinel EMS Workflow
Typically, the product owner defines the features and products in the catalog, the order taker defines the entitlement, and the vendor
The Basics
The following are the foundation of Sentinel LDK enforcement.
Features
Features are the basic building blocks of products and licenses. Each feature can represent anything from a functional component to an entire application. Learn More![]()
Products
A product represents a saleable item in your organization—such as a software application—usually with a SKU or similar unit. You can package products with individual features and memory files. Learn More![]()
Entitlements
A customer order for one or more products. Similar to orders in your back office system (ERP, CRM, billing system, or sales system), an entitlement specifies the products that a customer is entitled to use. Learn More![]()

The Steps
Follow the steps below to
•Review the Key Concepts for the Sentinel EMS components.
•Install Sentinel Run-time Environment on the computer on which you are burning the key, as described in Sentinel LDK Installation Guide.
•Open Sentinel Admin Control Center (http://localhost:1947) and configure it to work with Sentinel EMS. Show me how![]()
•Connect a Sentinel HL key.
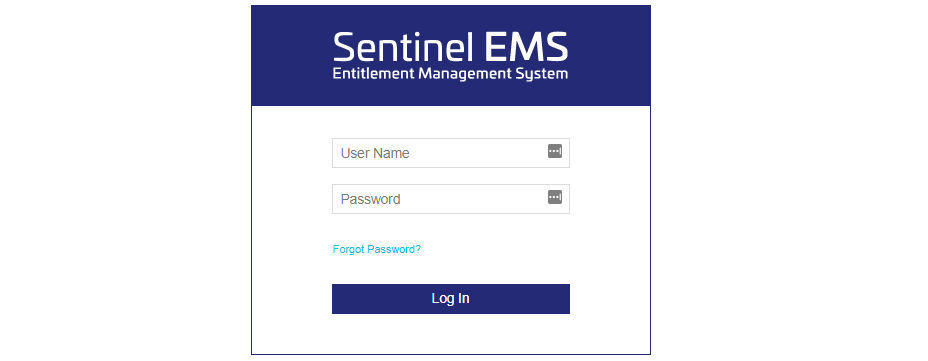
In this step, you connect to the Sentinel EMS Portal using the credentials shared by your Thales representative.
1.Navigate to the URL shared by Thales.
2.Log on using the user ID and password provided by Thales.
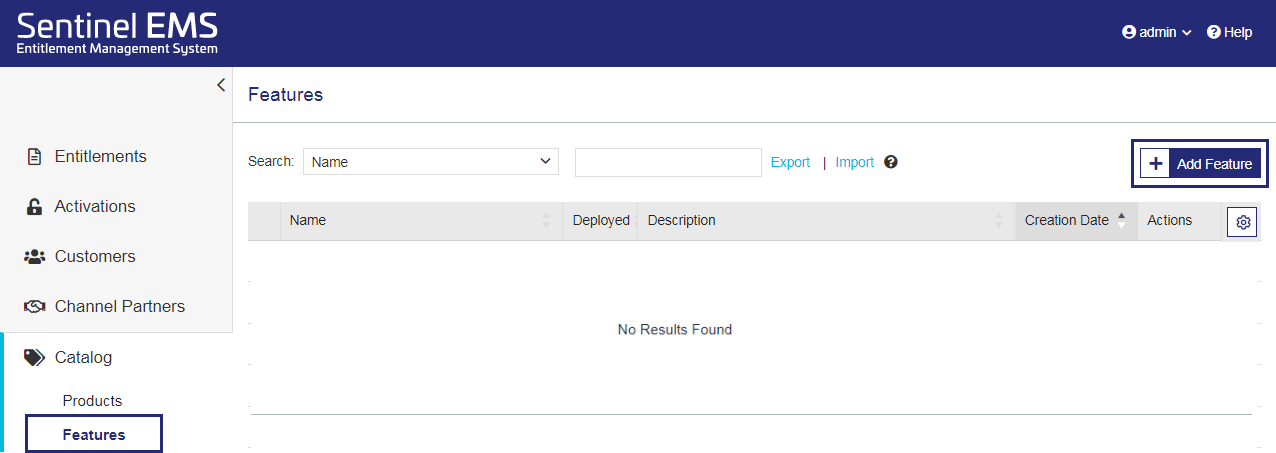
The first step in creating a catalog is defining features.
1.From the navigation pane, select Catalog > Features.
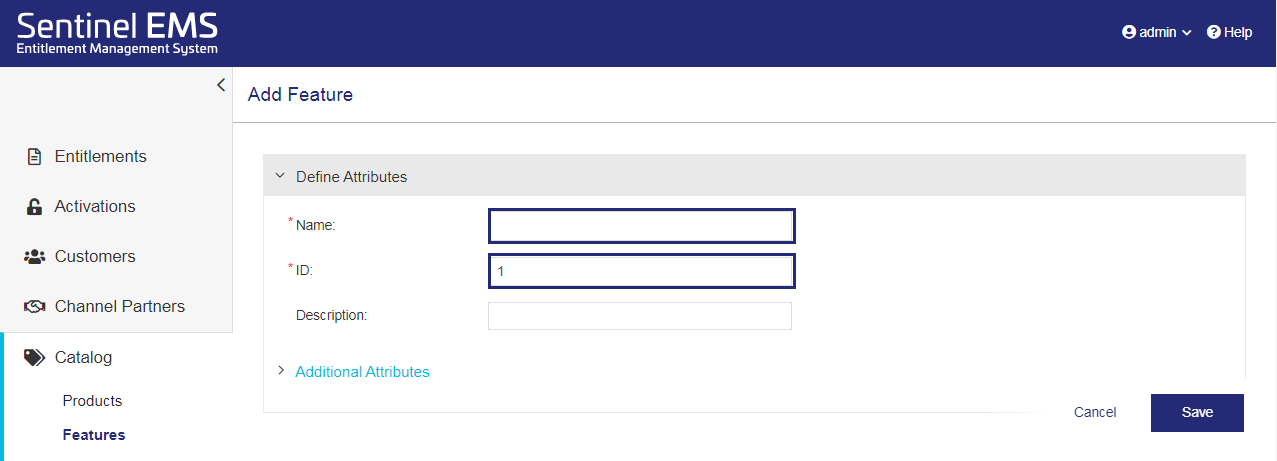
2.In the Features page, click Add Feature  .
.
3.In the Add Feature page, if the Namespace list is displayed (not shown), select the namespace you want to use. If you have your organization's batch code (known as a namespace in Sentinel EMS), you may want to select that namespace. Otherwise, select DEMOMA to use the demo namespace and batch code.
In the Name field, enter a feature name, such as Add to Cart.
4.In the Identifier field, leave the default identifier for now.
When you create your own features, you can use the default identifier or apply another identifier to match an existing feature in one of your company's products.
The identfier must match the feature ID in the Sentinel LDK application you are using to protect your application (Sentinel LDK Envelope or Sentinel Licensing API) as described in Features.
5.Click Save.
You've created your first feature. Next, you will add the feature to a product.
Now that you created a feature, you can add it to a product. This is known as associating a feature with a product. You can also associate a memory file, but we are not going to cover that here.
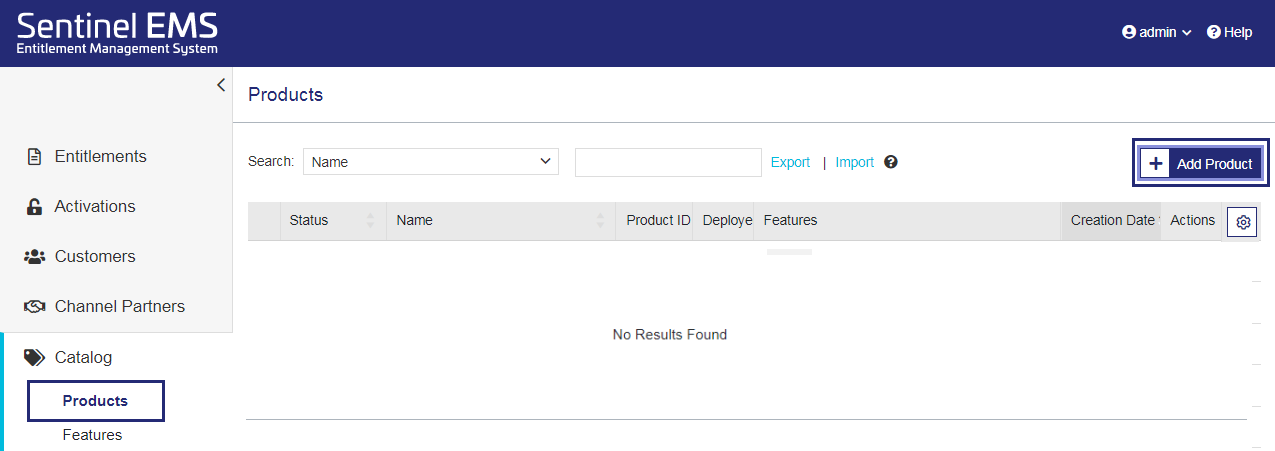
1.From the navigation pane, select Catalog > Products.
2.In the Products page, click Add Product .
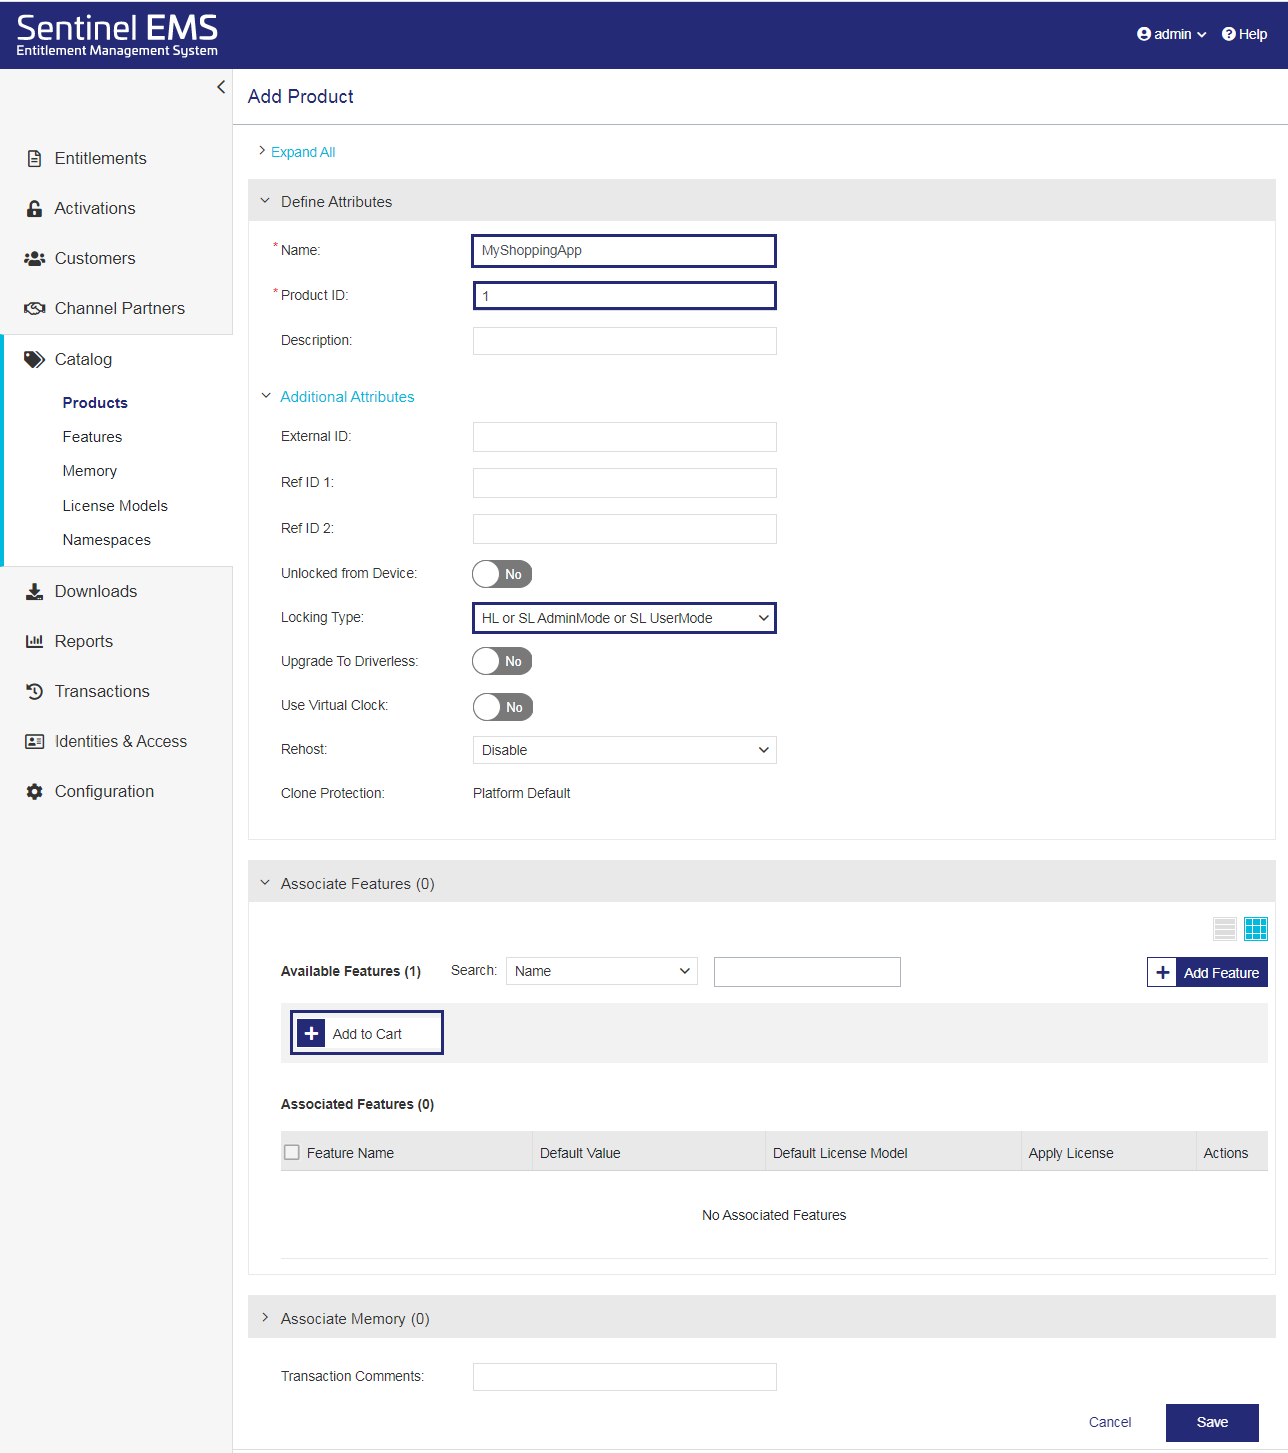
3. In the Add Product page, if the Namespace list is displayed (not shown), select the namespace you used when creating a feature. Otherwise, skip to the next step.
In the Name field, enter any product name, for example, MyShoppingApp.
4.In the Identifier field, leave the default identifier.
You can also manually change the identifier and use the same product identifier in multiple products, as described in Products.
5.Expand Additional Attributes, click the Locking Type arrow, and select an HL-related locking type, or leave the default HL or SL AdminMode or SL UserMode value as is. (Burning a key is relevant only for the HL locking type.)
6.In the Available Features area of the Associate Features pane, click the feature you created to add it to the Associated Features list.
7.In the Associated Features list, for the feature you added, either select the check box and click the Configure License Model button, or, under Actions, click Configure License Model ![]() .
.

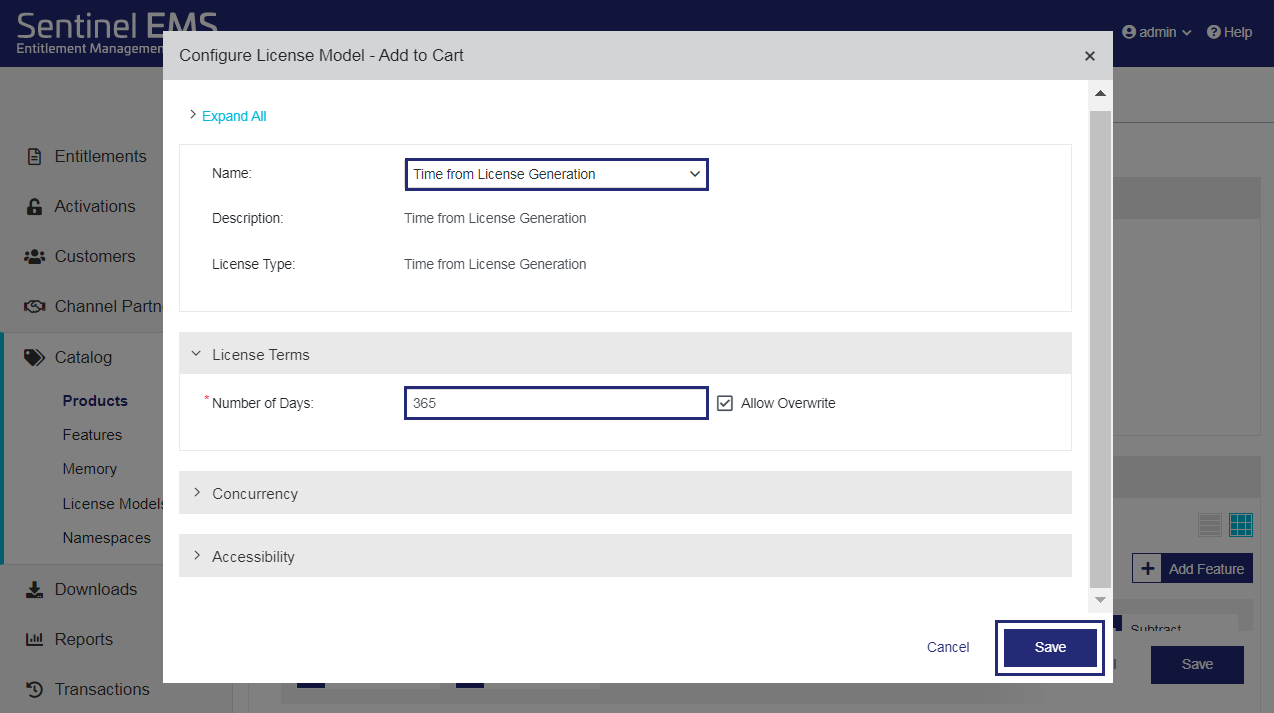
8.Set the license model.
a. Click the Name arrow and select Time from License Generation. Notice that the displayed attributes change to reflect the selected license model.
b. Expand License Terms and, in the Number of Days box, enter 365. (When the Allow Overwrite check box is selected, the order taker can modify the number of days later when creating an entitlement for a customer.)
c. Click Save.
9.In the Add Product page, click Save (not shown). The product is created as a draft.
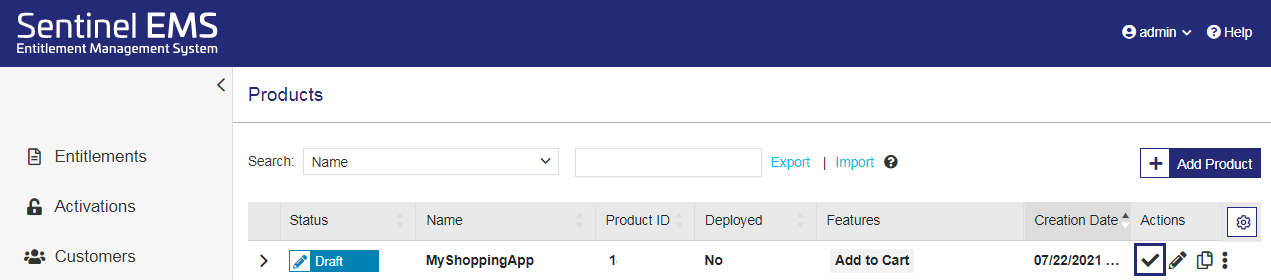
10.In the Products page, for the product you created, in the Actions column, click the Complete  button.
11.In the confirmation box that opens, click Complete (not shown). This makes the product available for distribution.
You've successfully created your first product. Next, you will create an order, known as an entitlement, for the product.

In this step, you are creating an entitlement.
1.From the navigation pane, select Entitlements.
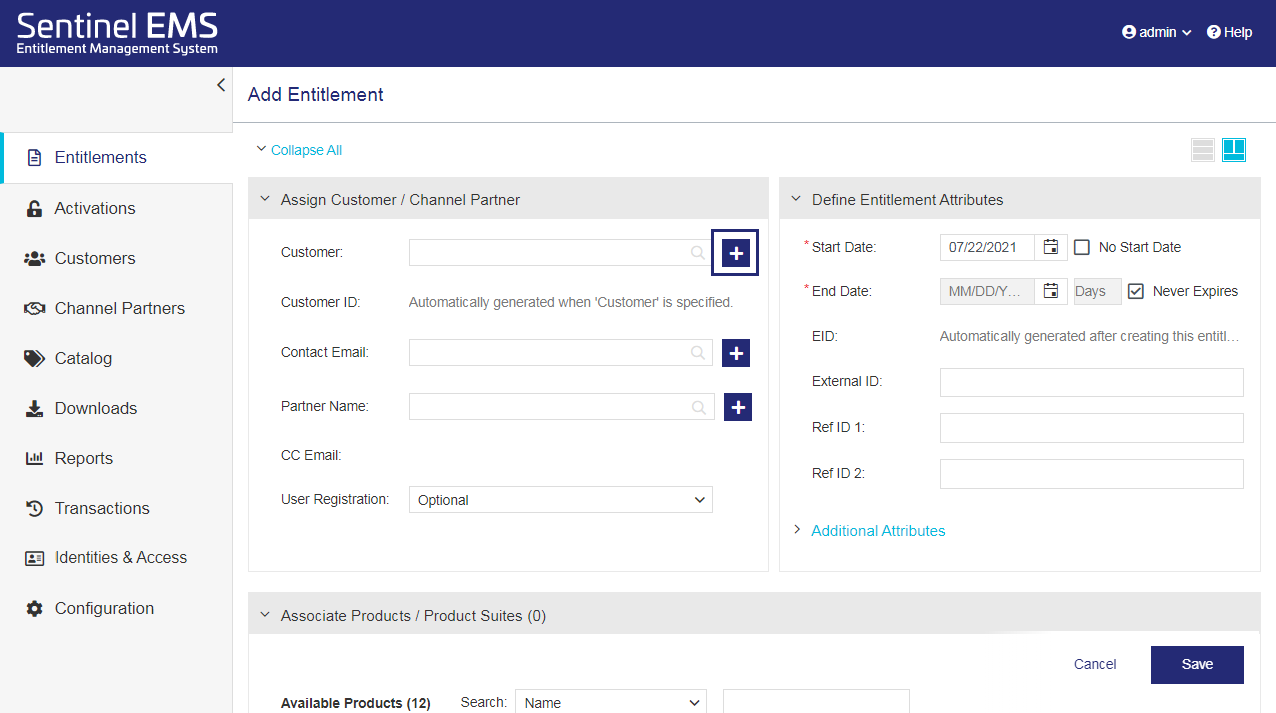
2.In the Entitlements page, click Add Entitlement .

3.Associate this entitlement with a new customer.
a. In the Add Entitlement page, next to the Customer field, click Add Customer  .
.
Tip: You can also define customers directly from the Customers tab.
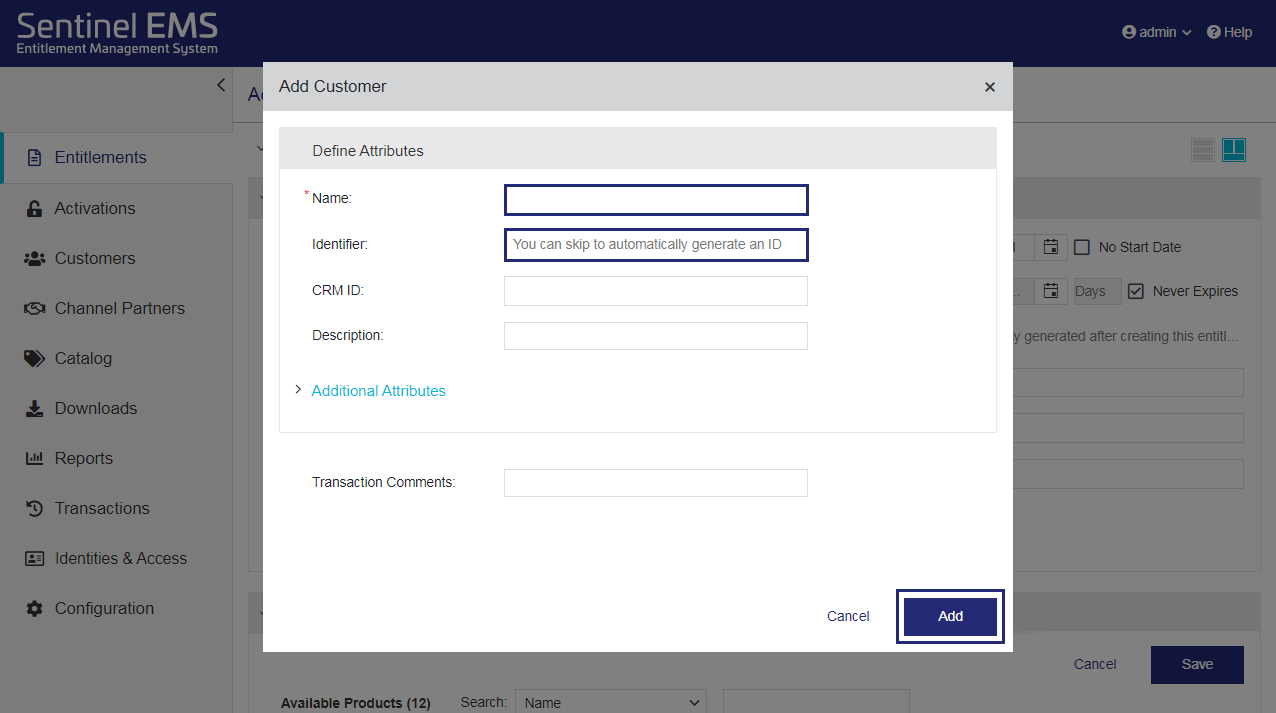
b. In the Add Customer dialog box, in the Name field, enter any customer name, for example, My Customer.
c. In the Identifier field, you can either enter an alphanumeric value or leave the field blank to enable Sentinel EMS to generate the ID automatically.
d. Click Add to finish creating the customer.
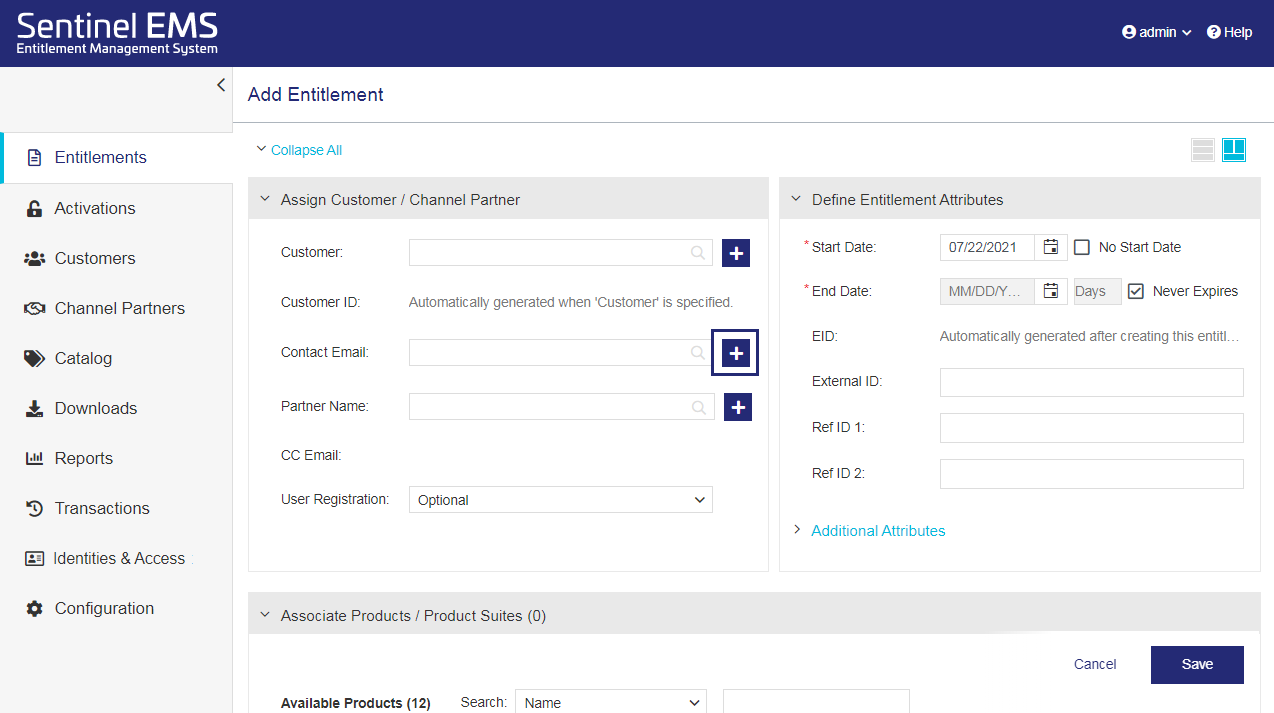
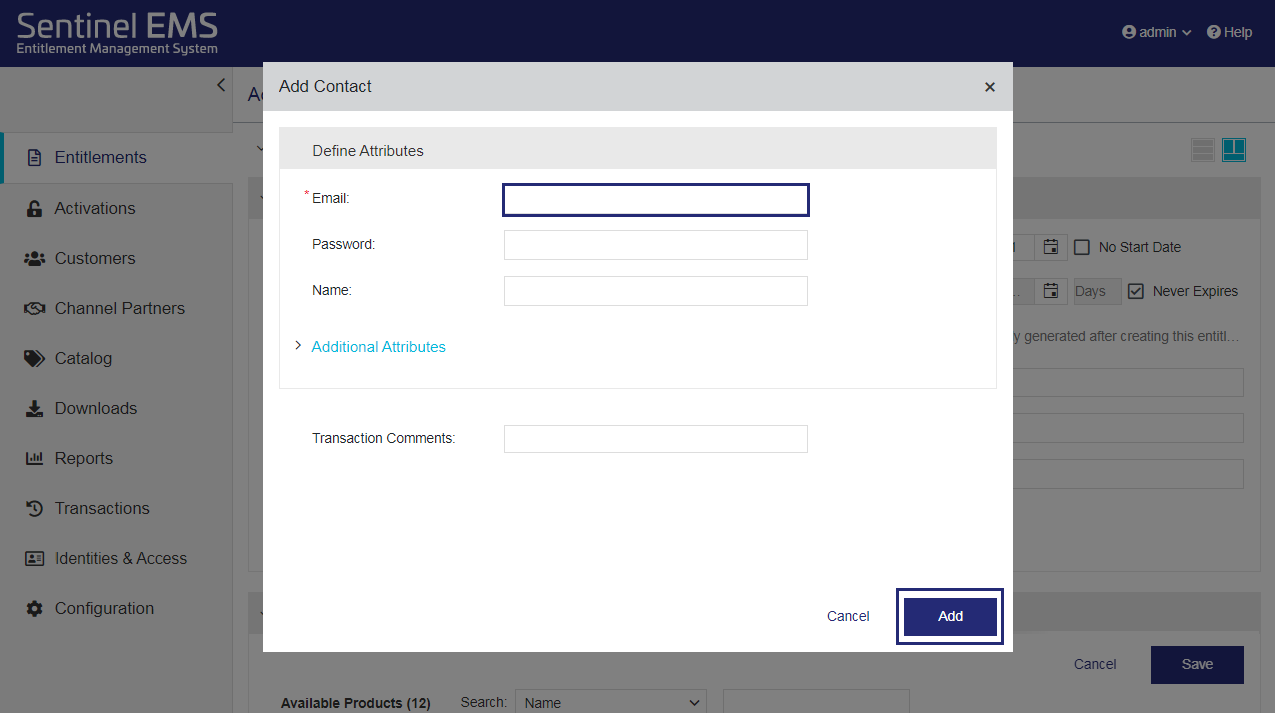
4.Add user details to the customer you just created.
a. In the Add Entitlement page, next to the User Email field, click Add User to open the Add User dialog box.
b. In the Email field, add the email address to which the entitlement certificate will be sent.
c. Click Add. The user is created and the user email address is associated with the customer you just created.
5.In the Associate Products / Product Suites pane, under Available Products, click the product you created to add it to the Associated Products / Product Suites section.
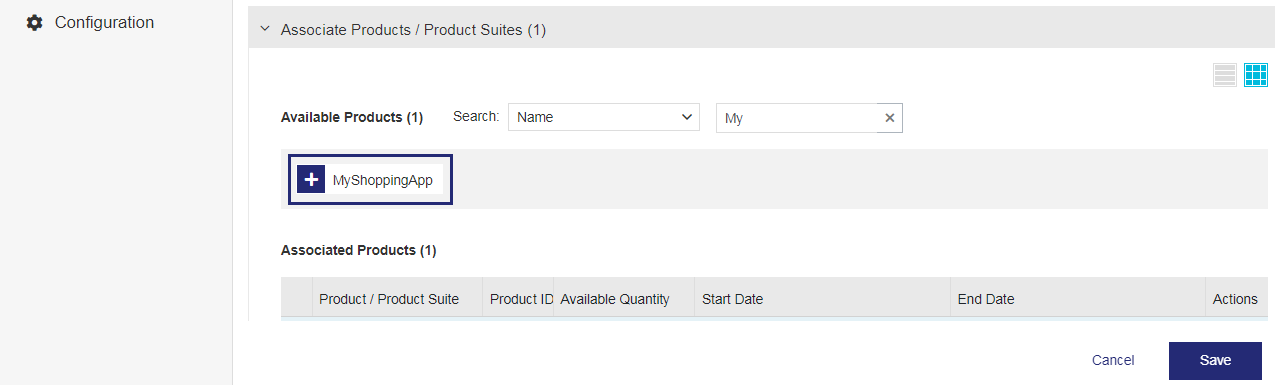
6.Click Save to save the entitlement as a draft. (If you skip this and go to another tab, your input will be lost.)
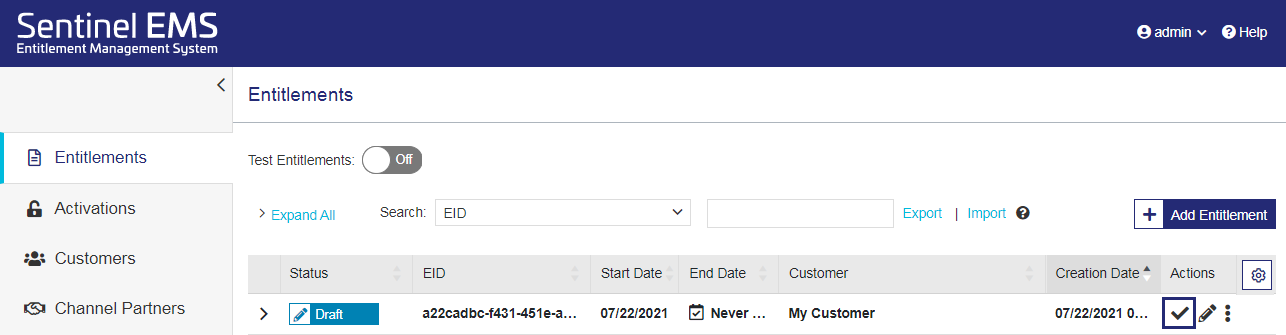
7.In the Entitlements page, in the Actions column, click to complete the entitlement.
(The image shows the Draft status prior to confirmation.)
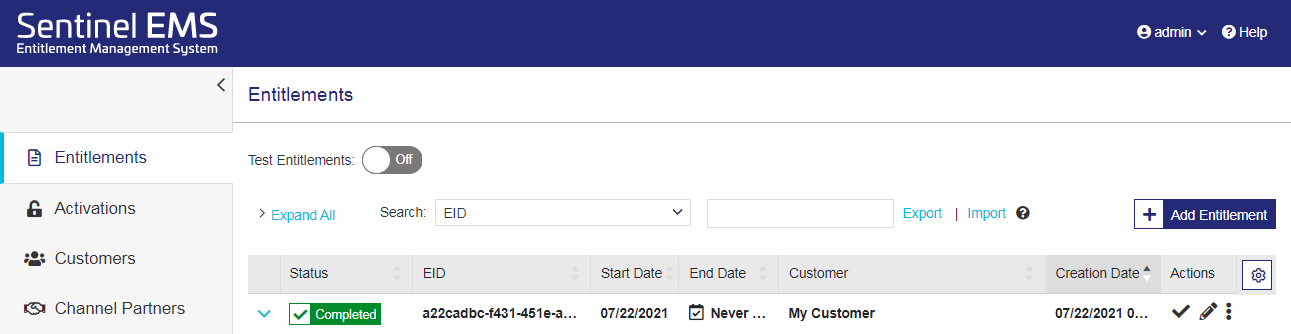
8.In the confirmation box, click Complete (not shown). The entitlement details are saved. An Entitlement Certificate email is sent to the user email address you entered earlier.
(The image shows the Completed status post-confirmation.)
In the next step, you will
In this step, you burn a Sentinel HL key to be distributed with the product.
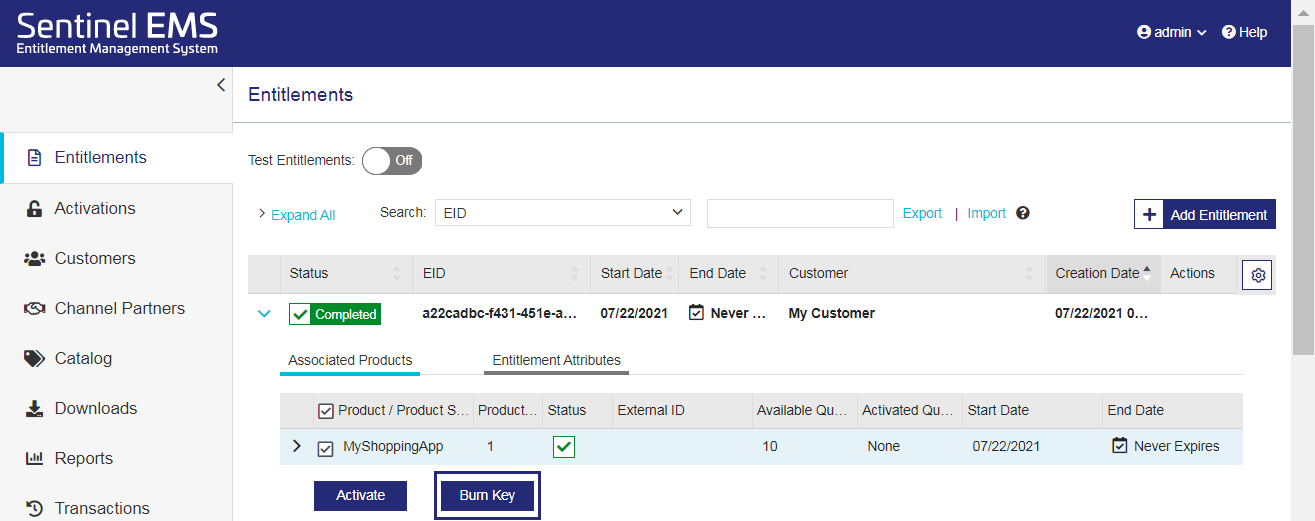
1.From the navigation pane, select Entitlements.
2.Expand the entitlement you created and click Burn Key.
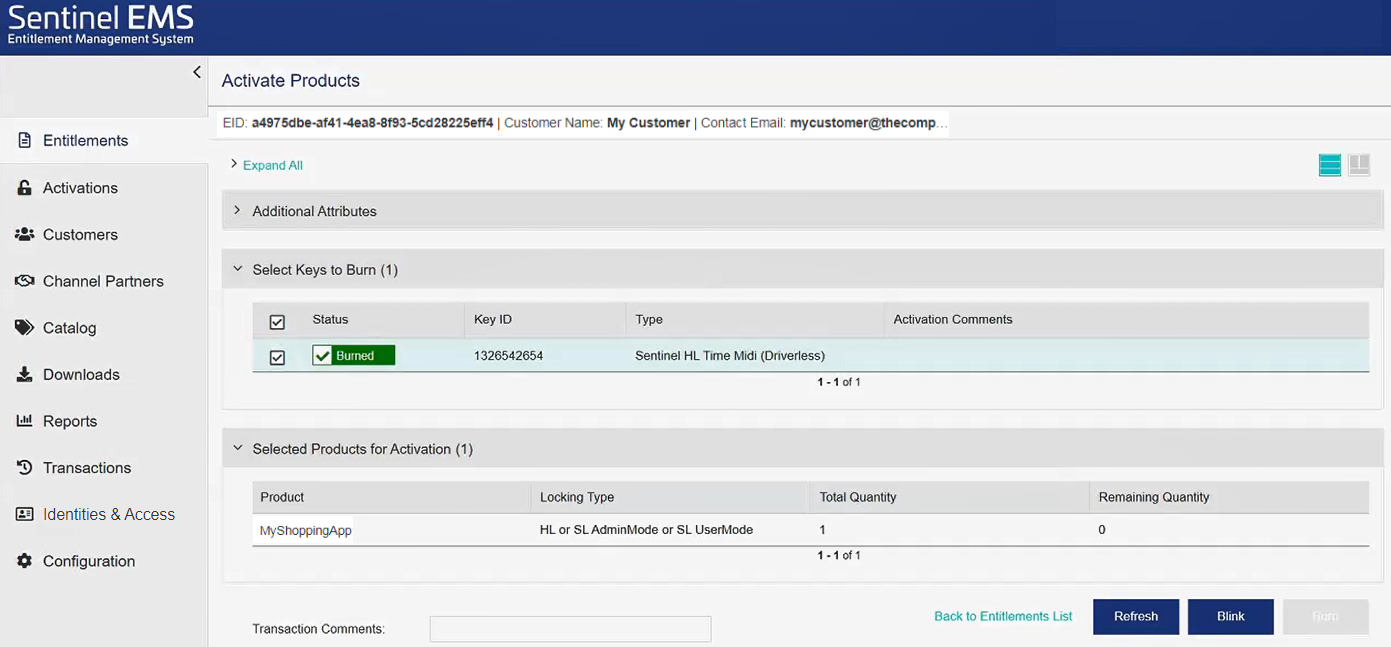
3. In the Activate Products page > Select Keys to Burn area, select the key you want to burn if it is not already selected.
(If you don't see the key, make sure that the key is connected (as described in Step 1: Before You Begin) and click Refresh.)
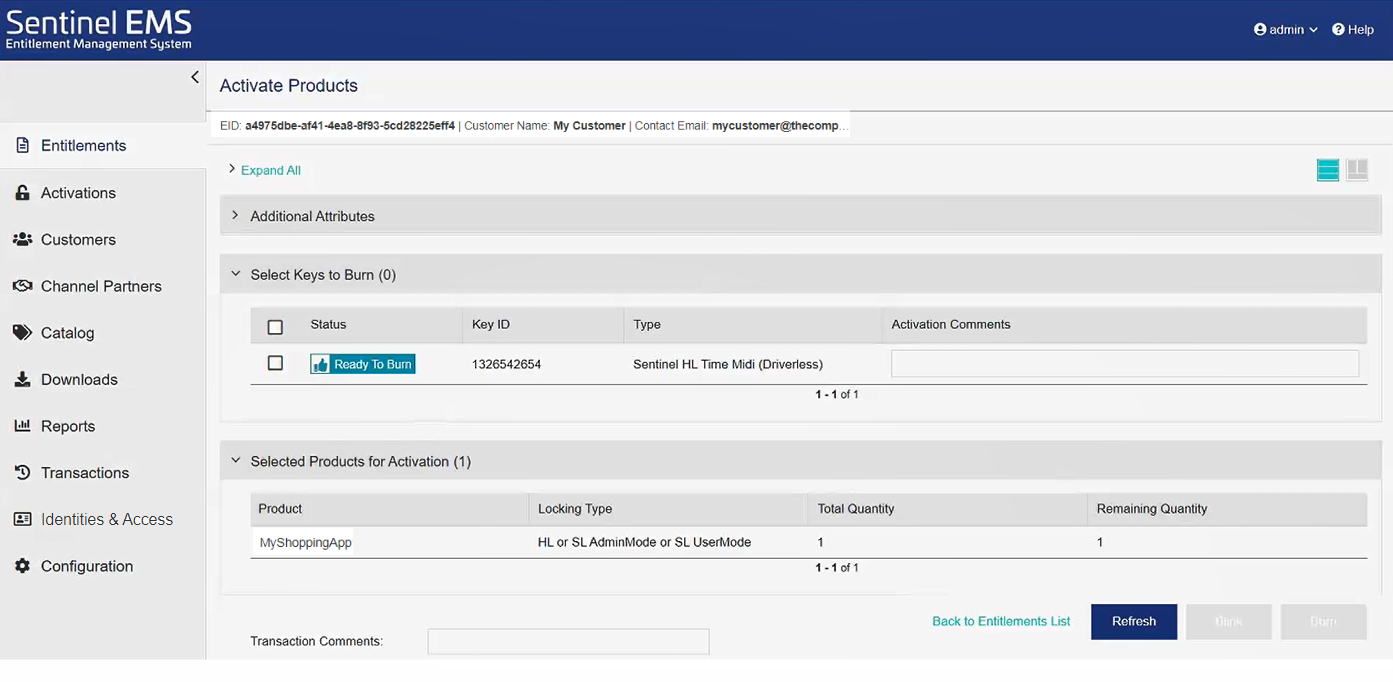
4.Click Burn.
5.The key is marked as Burned.
6.(Optional) View the activation in Sentinel EMS (not shown).
In the navigation pane, click Entitlements. Then, In the Actions column for the entitlement you just burned, select More > View Activations. The license string from the C2V file is displayed.
7.(Optional) View the activation on the product key in Sentinel Admin Control Center (not shown).
Congratulations! You burned a license on your Sentinel HL key.